Garden Wasabi Planting: What To Do and What Not To Do

First I want to reiterate that our home garden wasabi planting is intended to approximate a laissez faire gardener environment, with no special treatment, hot and dry conditions in the summer and cold in the winter (relative to the Oregon Coast) to test the plants' response.  See this former blog post for more.  This was done to such an extent that we intentionally did' t follow our own recommended planting instructions.  Thus, I've structured this blog episode into "our preparation" and "recommended preparation" which is the information that accompanies plant start purchase packages.  I can assure you that we are not laissez faire at the Frog Eyes wasabi Farm - and not about much else if truth be told.  But, I want to assure the readers that there's no special treatment or hidden magic being applied to the plants in our home garden (this garden needs a name don't you think?).  This summer, 2016, I planted an additional wasabi plant start half-wine barrel with an intention to display the correct way to plant wasabi and the incorrect way and the results.  

Our Preparation: (Note, this is what I did, and not necessarily best practices.) Soil/media: First, I planted a half-wine barrel using store-bought organic potting oil and about 25% large, 1-inch pumice for drainage and oxygenation.  Sunlight: Unlike the initial barrel that receives sunlight in late January and early February in the early morning, I placed the barrel in a location that receives sun in months 3/4 and 8/9 at about noon for about 1.5 hours. This to increase the sunlight strength at a much stronger solar period.  I planted small plant starts without leaves and larger ones with leaves. This was done to display the plant's accommodation of inhospitable conditions at different growth stages. I also planted at the hottest week and driest week of the entire year, with temperatures at 100dF and humidity between 15-30%.  

Recommended Preparation: 

Planting Depth: 1 inch or less - Only deep enough to keep the start upright;  Spacing:   12 inches on center;     Hardiness: 27°F;     Soil Type: Well-drained, rich in organic matter    Location: Full Shade  

Choose a well-drained location with sufficient organic matter. If you’re planting in a pot the container size should be 10 inches or larger (a 2.5 gallon minimum). Work in 10-12 inches of compost to a soil depth of 8-10 inches. Wasabi requires a neutral or slightly acidic soil pH of 6-7.  Plant your start only deep enough to keep it upright.  Being sure that all of the roots are covered, backfill the hole and gently press into place. Do not cover the rhizome, it needs to be exposed above the surface. Wasabi plants can reach 24 inches in height so space plants at least 12 inches apart. Water well, but do not let the plant sit in drainage water. After initial planting irrigate regularly with cool water. Mist as necessary to keep plants cool and to avoid wilted leaves. Mulch may increase moisture retention, which will be especially beneficial during warmer months.   Leaves that have been wilted for a week or more should be removed to deter pests and lower the risk of disease. Keep the planting bed or containers weed free and fertilize regularly with a balanced, all-purpose fertilizer. Fertilizers or foliar sprays rich in sulfur may improve the flavor of the rhizome. 

Cultivation: In its natural habitat you will find Wasabi growing on the shaded wet banks of cold mountain streams. When grown in a home garden Wasabi does best in full shade with steady temperatures between 50-60°F, although the Daruma variety is slightly more tolerant of heat and light. Temperatures below 40°F may slow growth and temperatures below 27°F can kill the entire plant. Temperatures above 80°F can begin to cause heat damage as well as increase the risk of pests and disease. So take this into consideration when selecting a planting sight for your Wasabi.

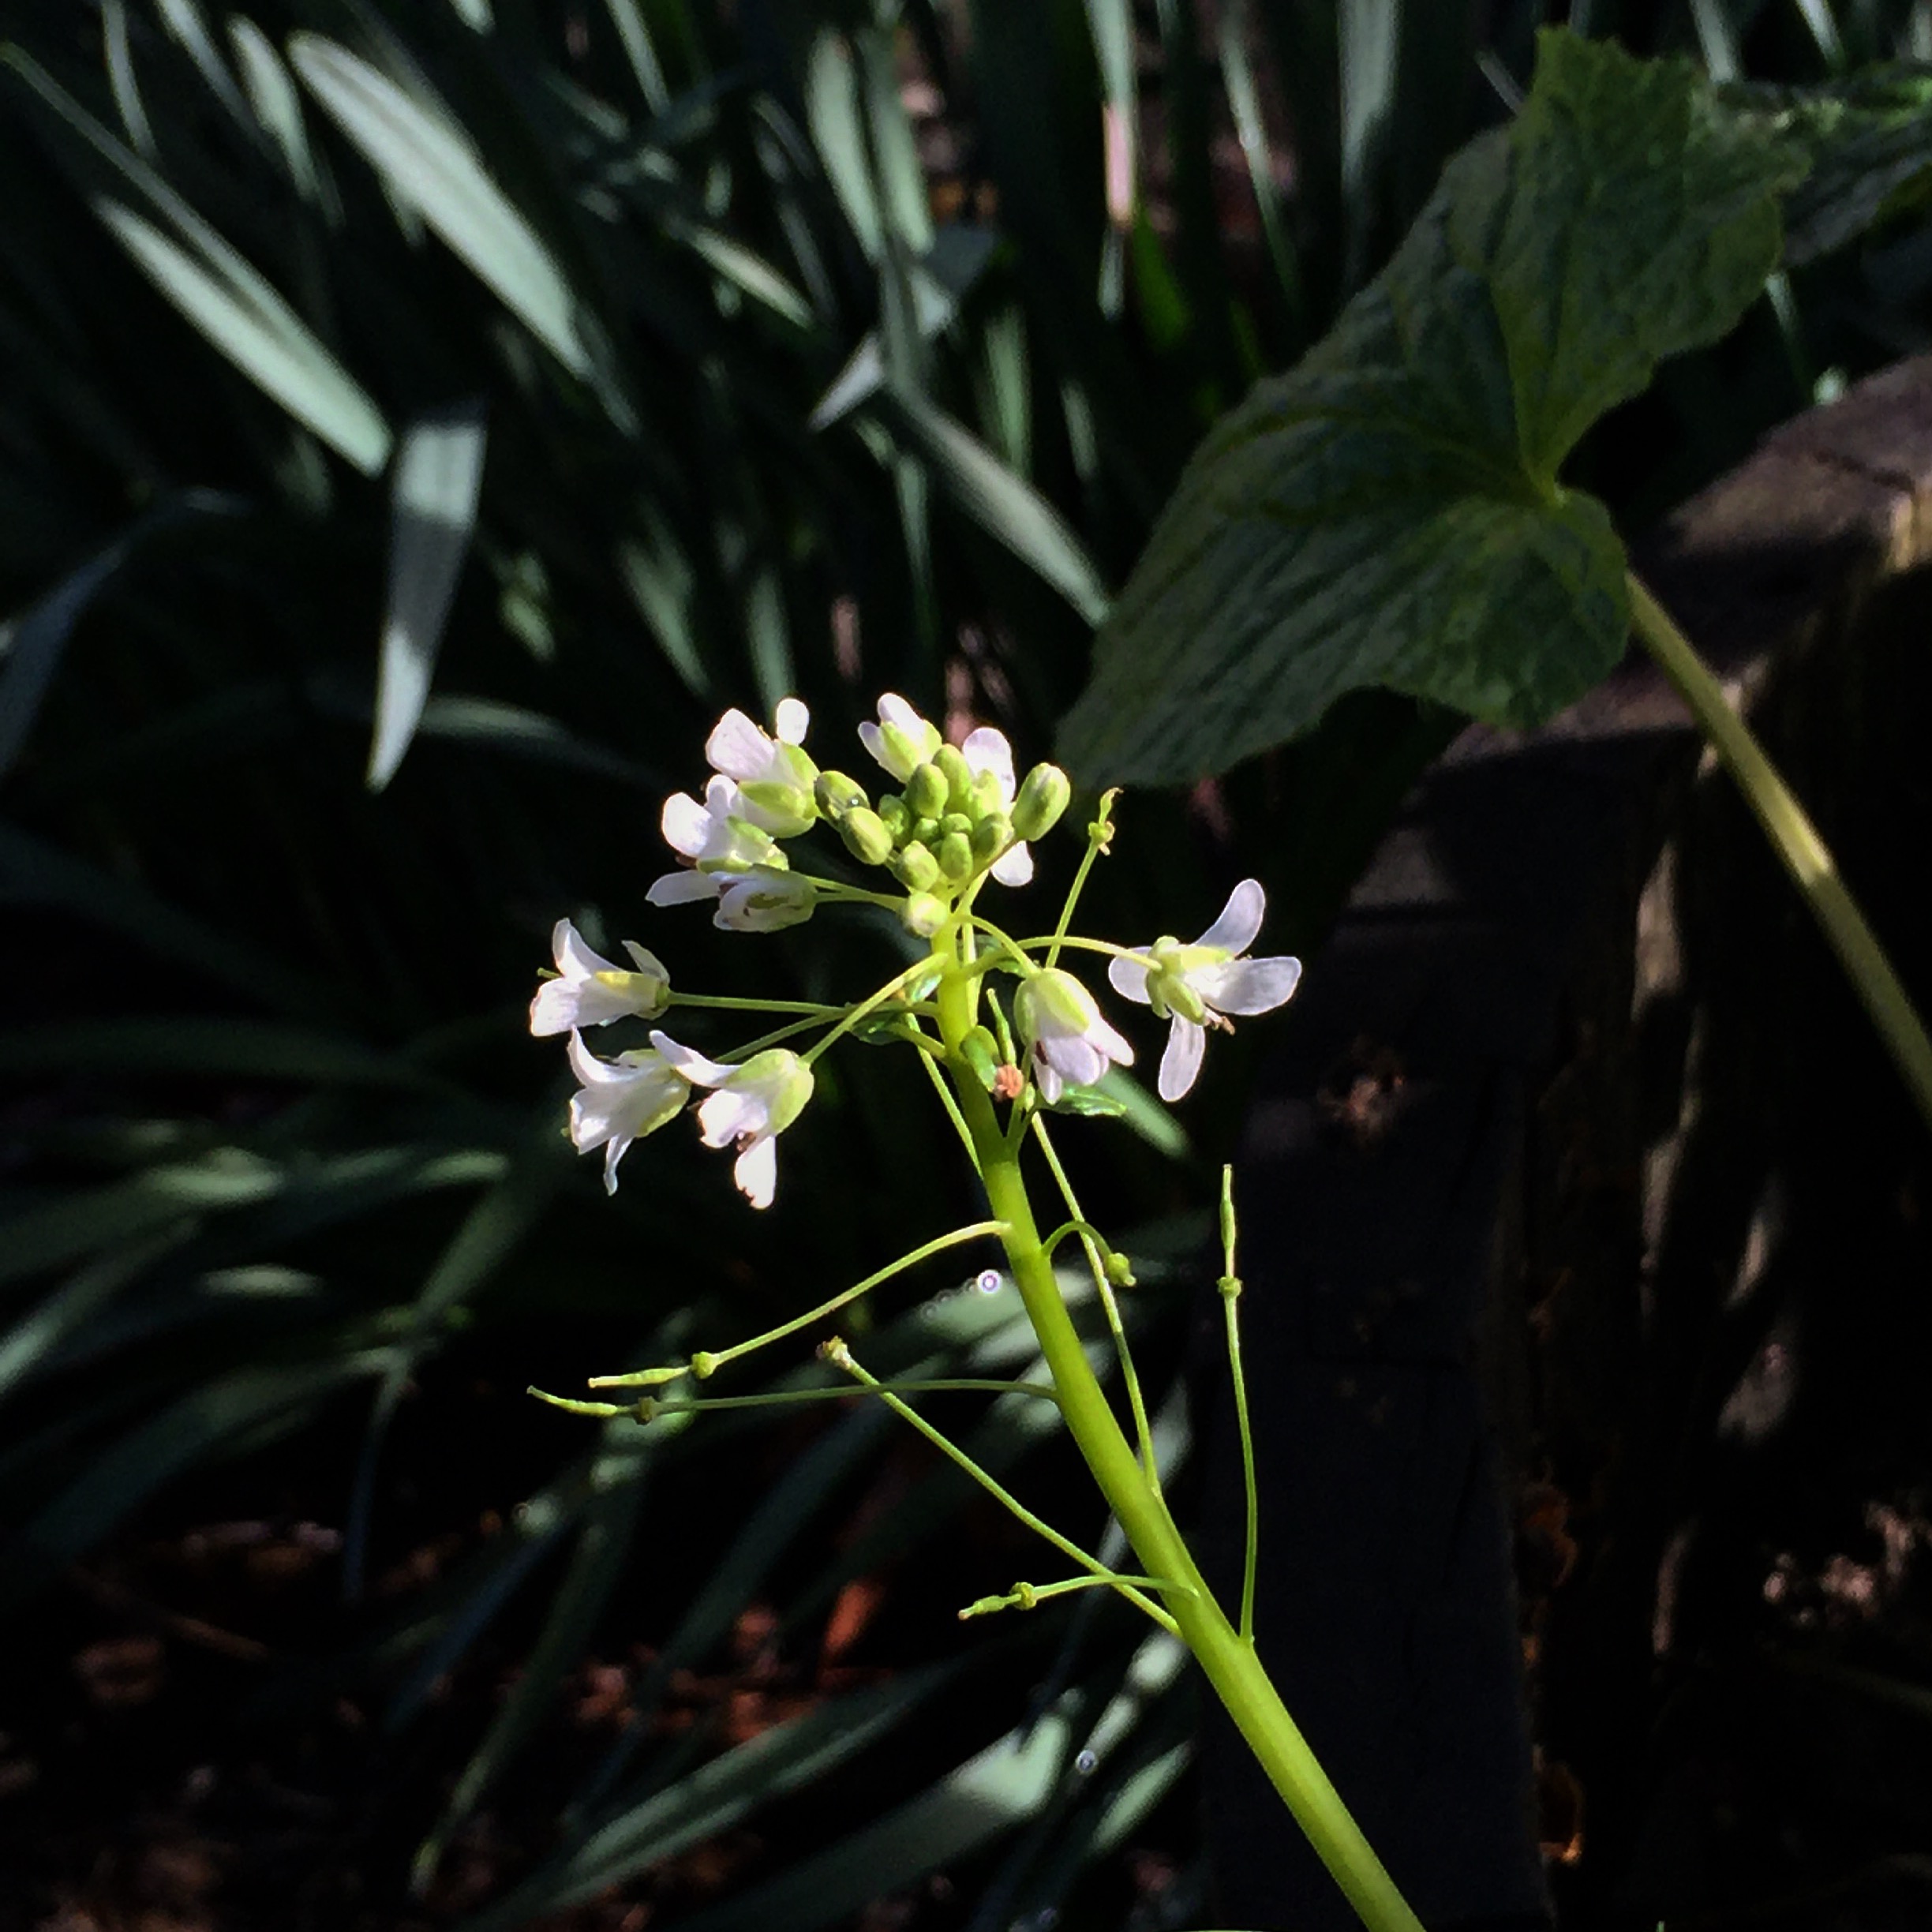
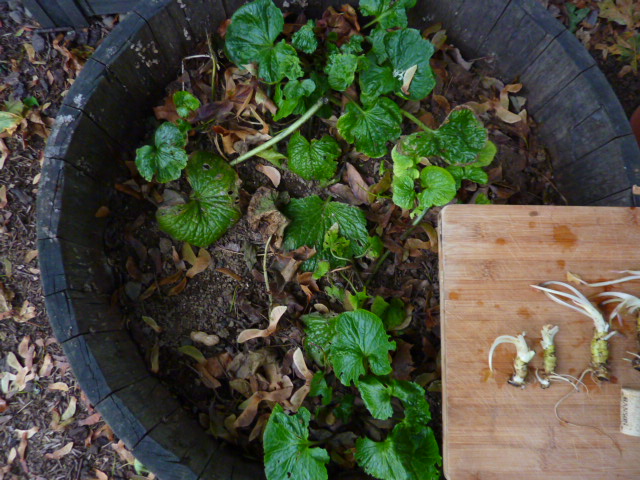
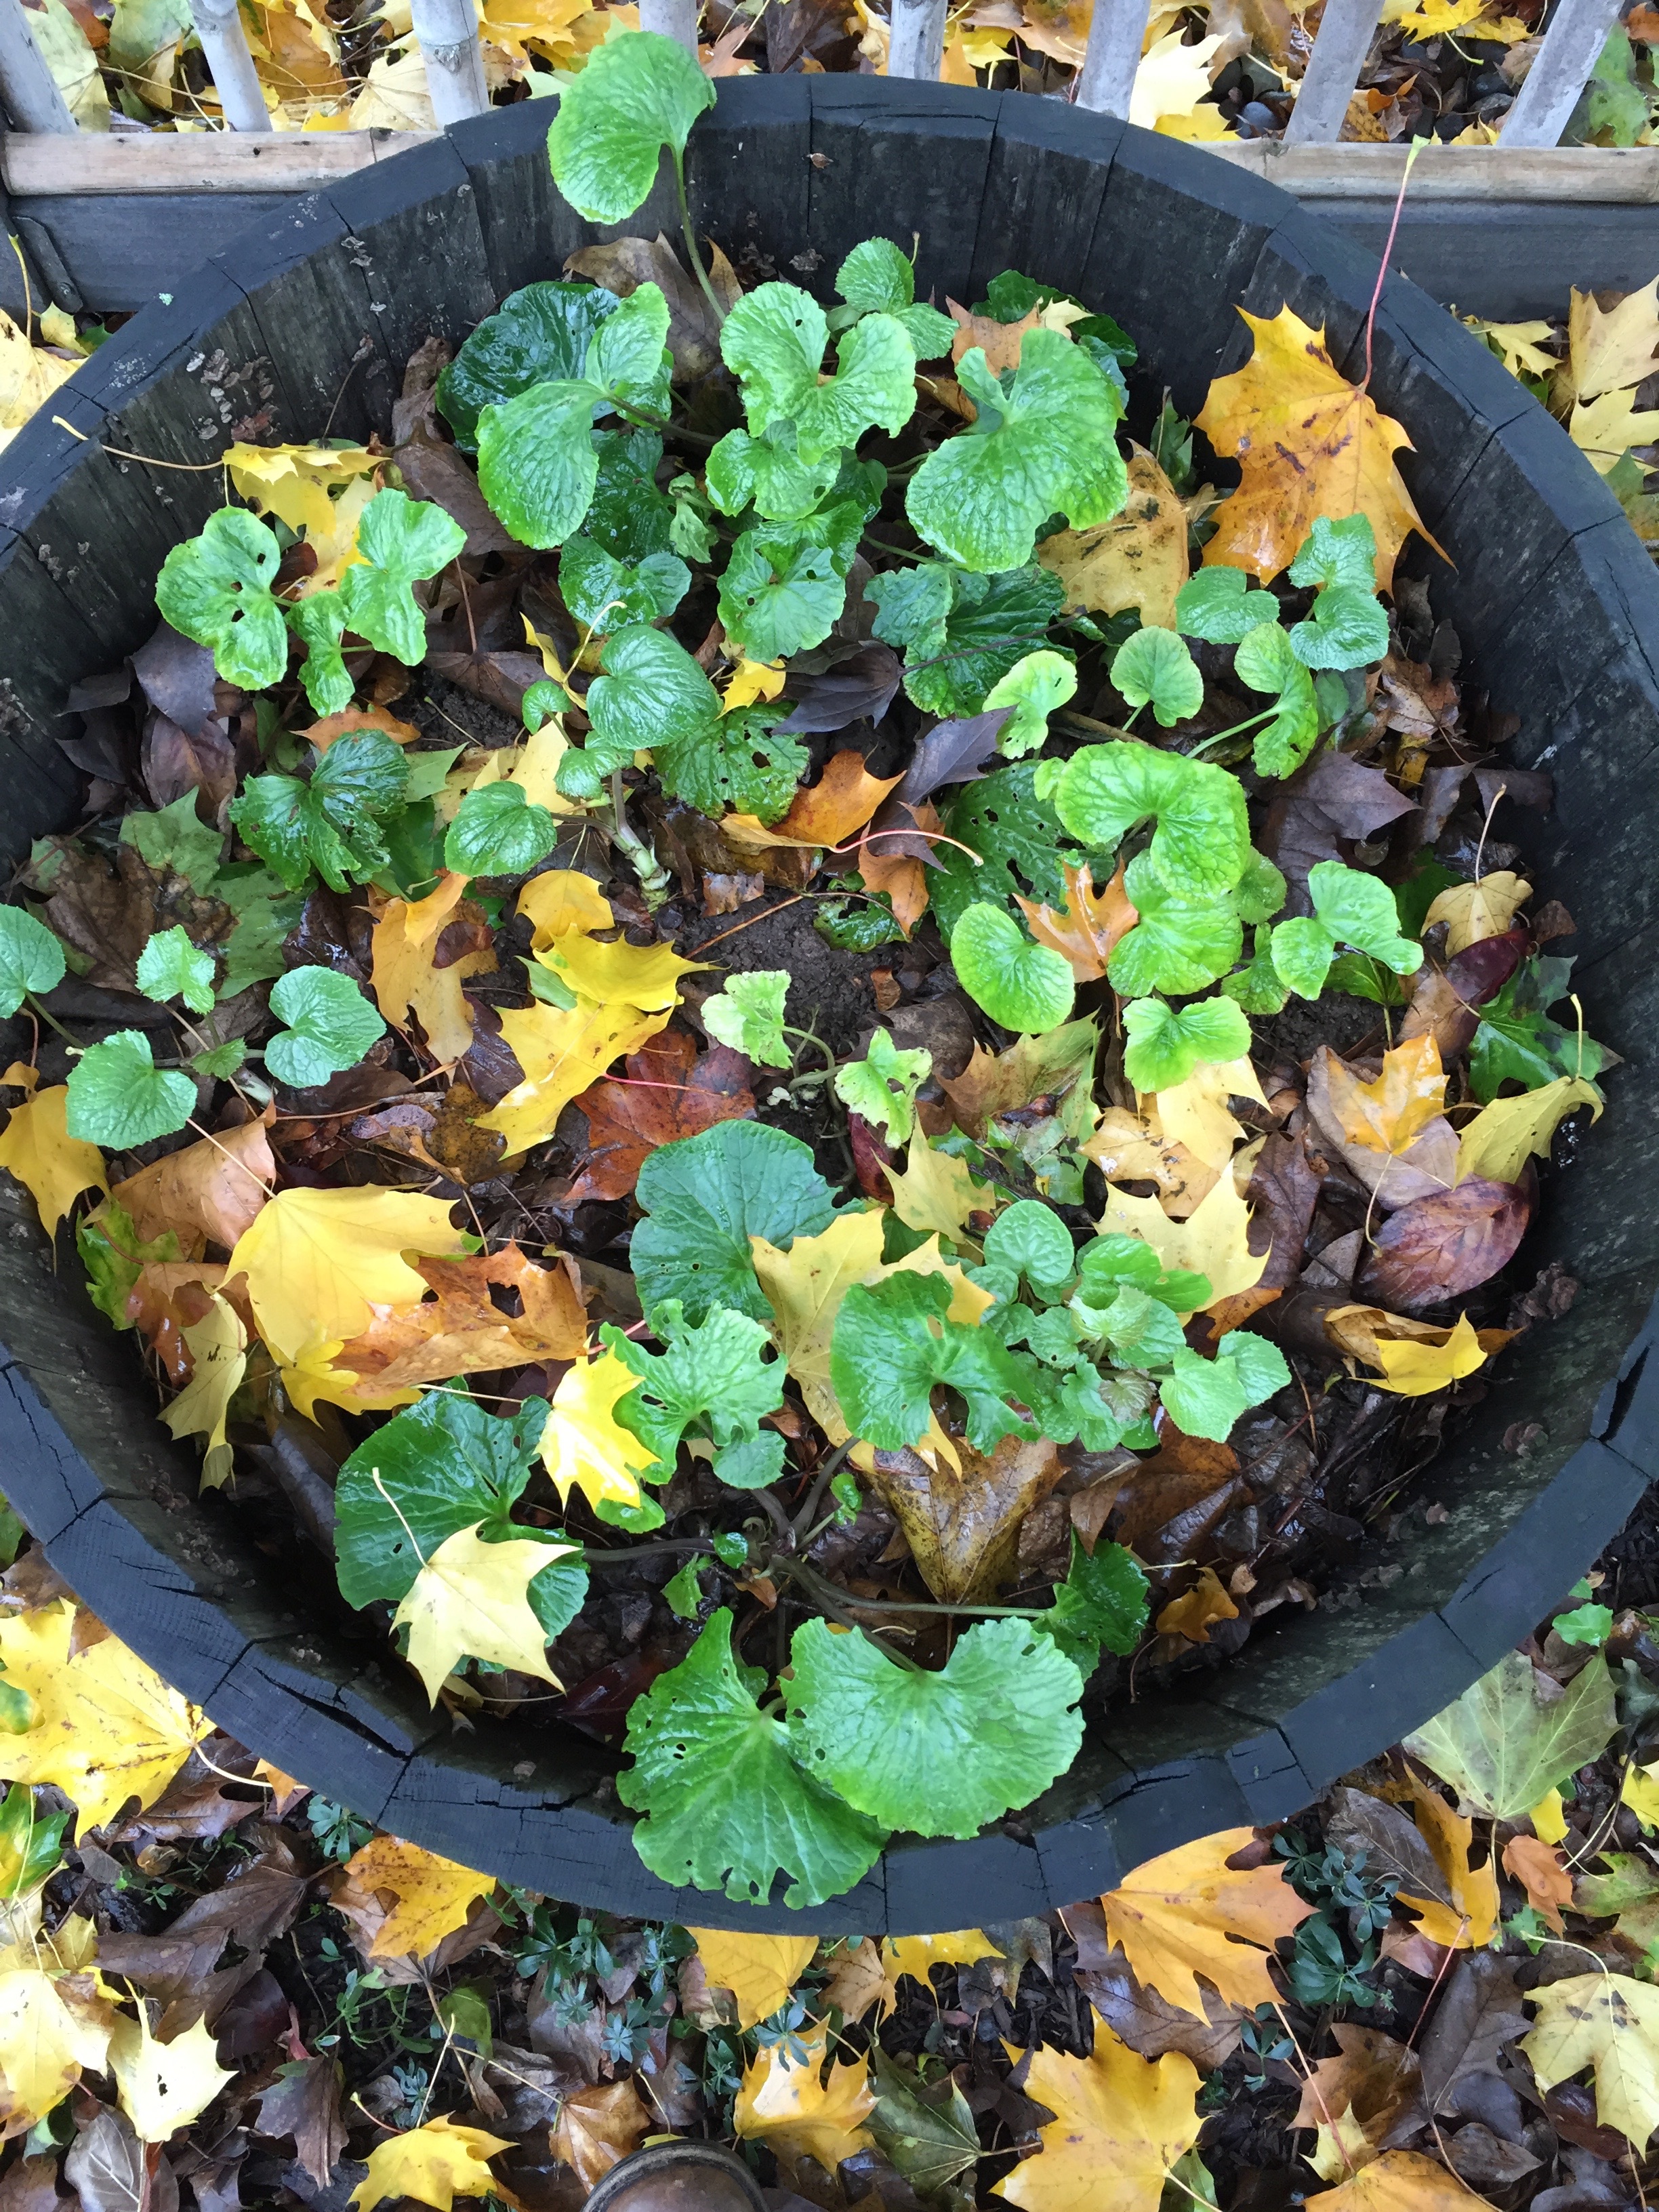
As seen, there's loads of sunlight.  We do not recommend any direct sunlight at any time of the year.  Wasabi grows in alpine streams at elevation and under evergreen canopy.  If one should err on sunlight or shade, give wasabi shade.

Our Method: The larger plants were potted.  Continuing on the laissez faire gardener condition, they "rested" on the side of the currently-planted wasabi barrel for a few weeks, receiving no sun, and some water and routinely being kicked over by our faithful hound.  The first photo below shows the potted plants prior to planting and the volume of pumice used for the top layer of potting soil and the sunlight.

Recommended Method:

Showing the potted plant hole depth.  I add a bit of pumice at the bottom of the hole for root drainage.  

Photo taken several minutes later after the sun was shaded by the house.  This photo shows the backfill to the potted plant hole and the plant spacing which is about 8 inches on center.

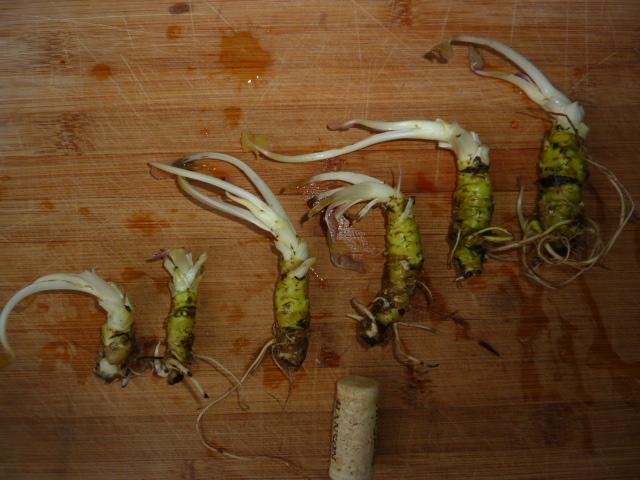
This photo shows the new plant starts that are new.  This is how the first wine barrel's plants began.  This photo shows their size and the bare root condition.  This is how The Wasabi Store ships plant starts.  They are nearly always successful, unless planted on the hottest day and driest day(s) of the year and with direct sun.  The potted plants were once just like these about two months ago.  I recommend that if you order plant starts in the summer to plant them in a cloudy and cool week.  If they arrive during a hot spell, keep them in the refrigerator in a plastic bag and wrapped in a wet muslin or paper towel (just like the storage instructions for the mature rhizome).  They will be much happier in the cool, damp refrigerator.  These are not your typical plants.  Don't panic about "getting them in the ground as soon as possible" or other common plant-planting axioms.  I'd recommend the maximum time in the refrigerator is 3 weeks.  If it's going to be that hot during your summer, wait to plant in the autumn so the plants are established for the following summer. 

Having planted the small starts just like the others.  Soil almost, but not up to the bottom of the stems.   Don't worry about root oxygenation like other plants.  Don't pack the soil.  Just water and let the water weight pack the soil.  Oxygenation is encouraged, not discouraged.   See how the plants are planted with soil just to the bottom of the rhizome?  That's the correct depth.  More soil can always be added later.  It's better to not smother the plants and allow air in, rather than make too damp an environment.  


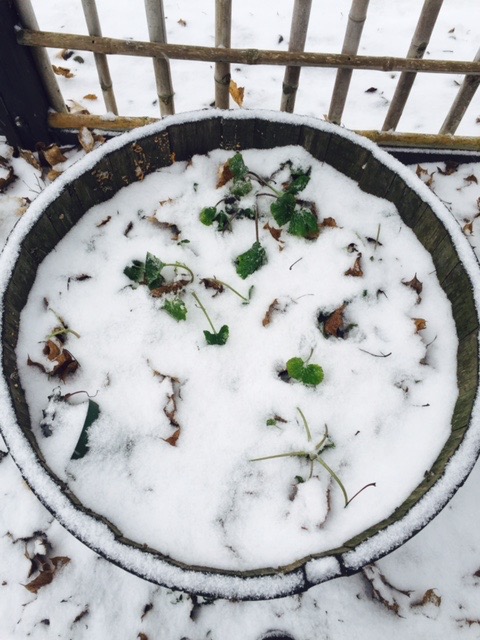
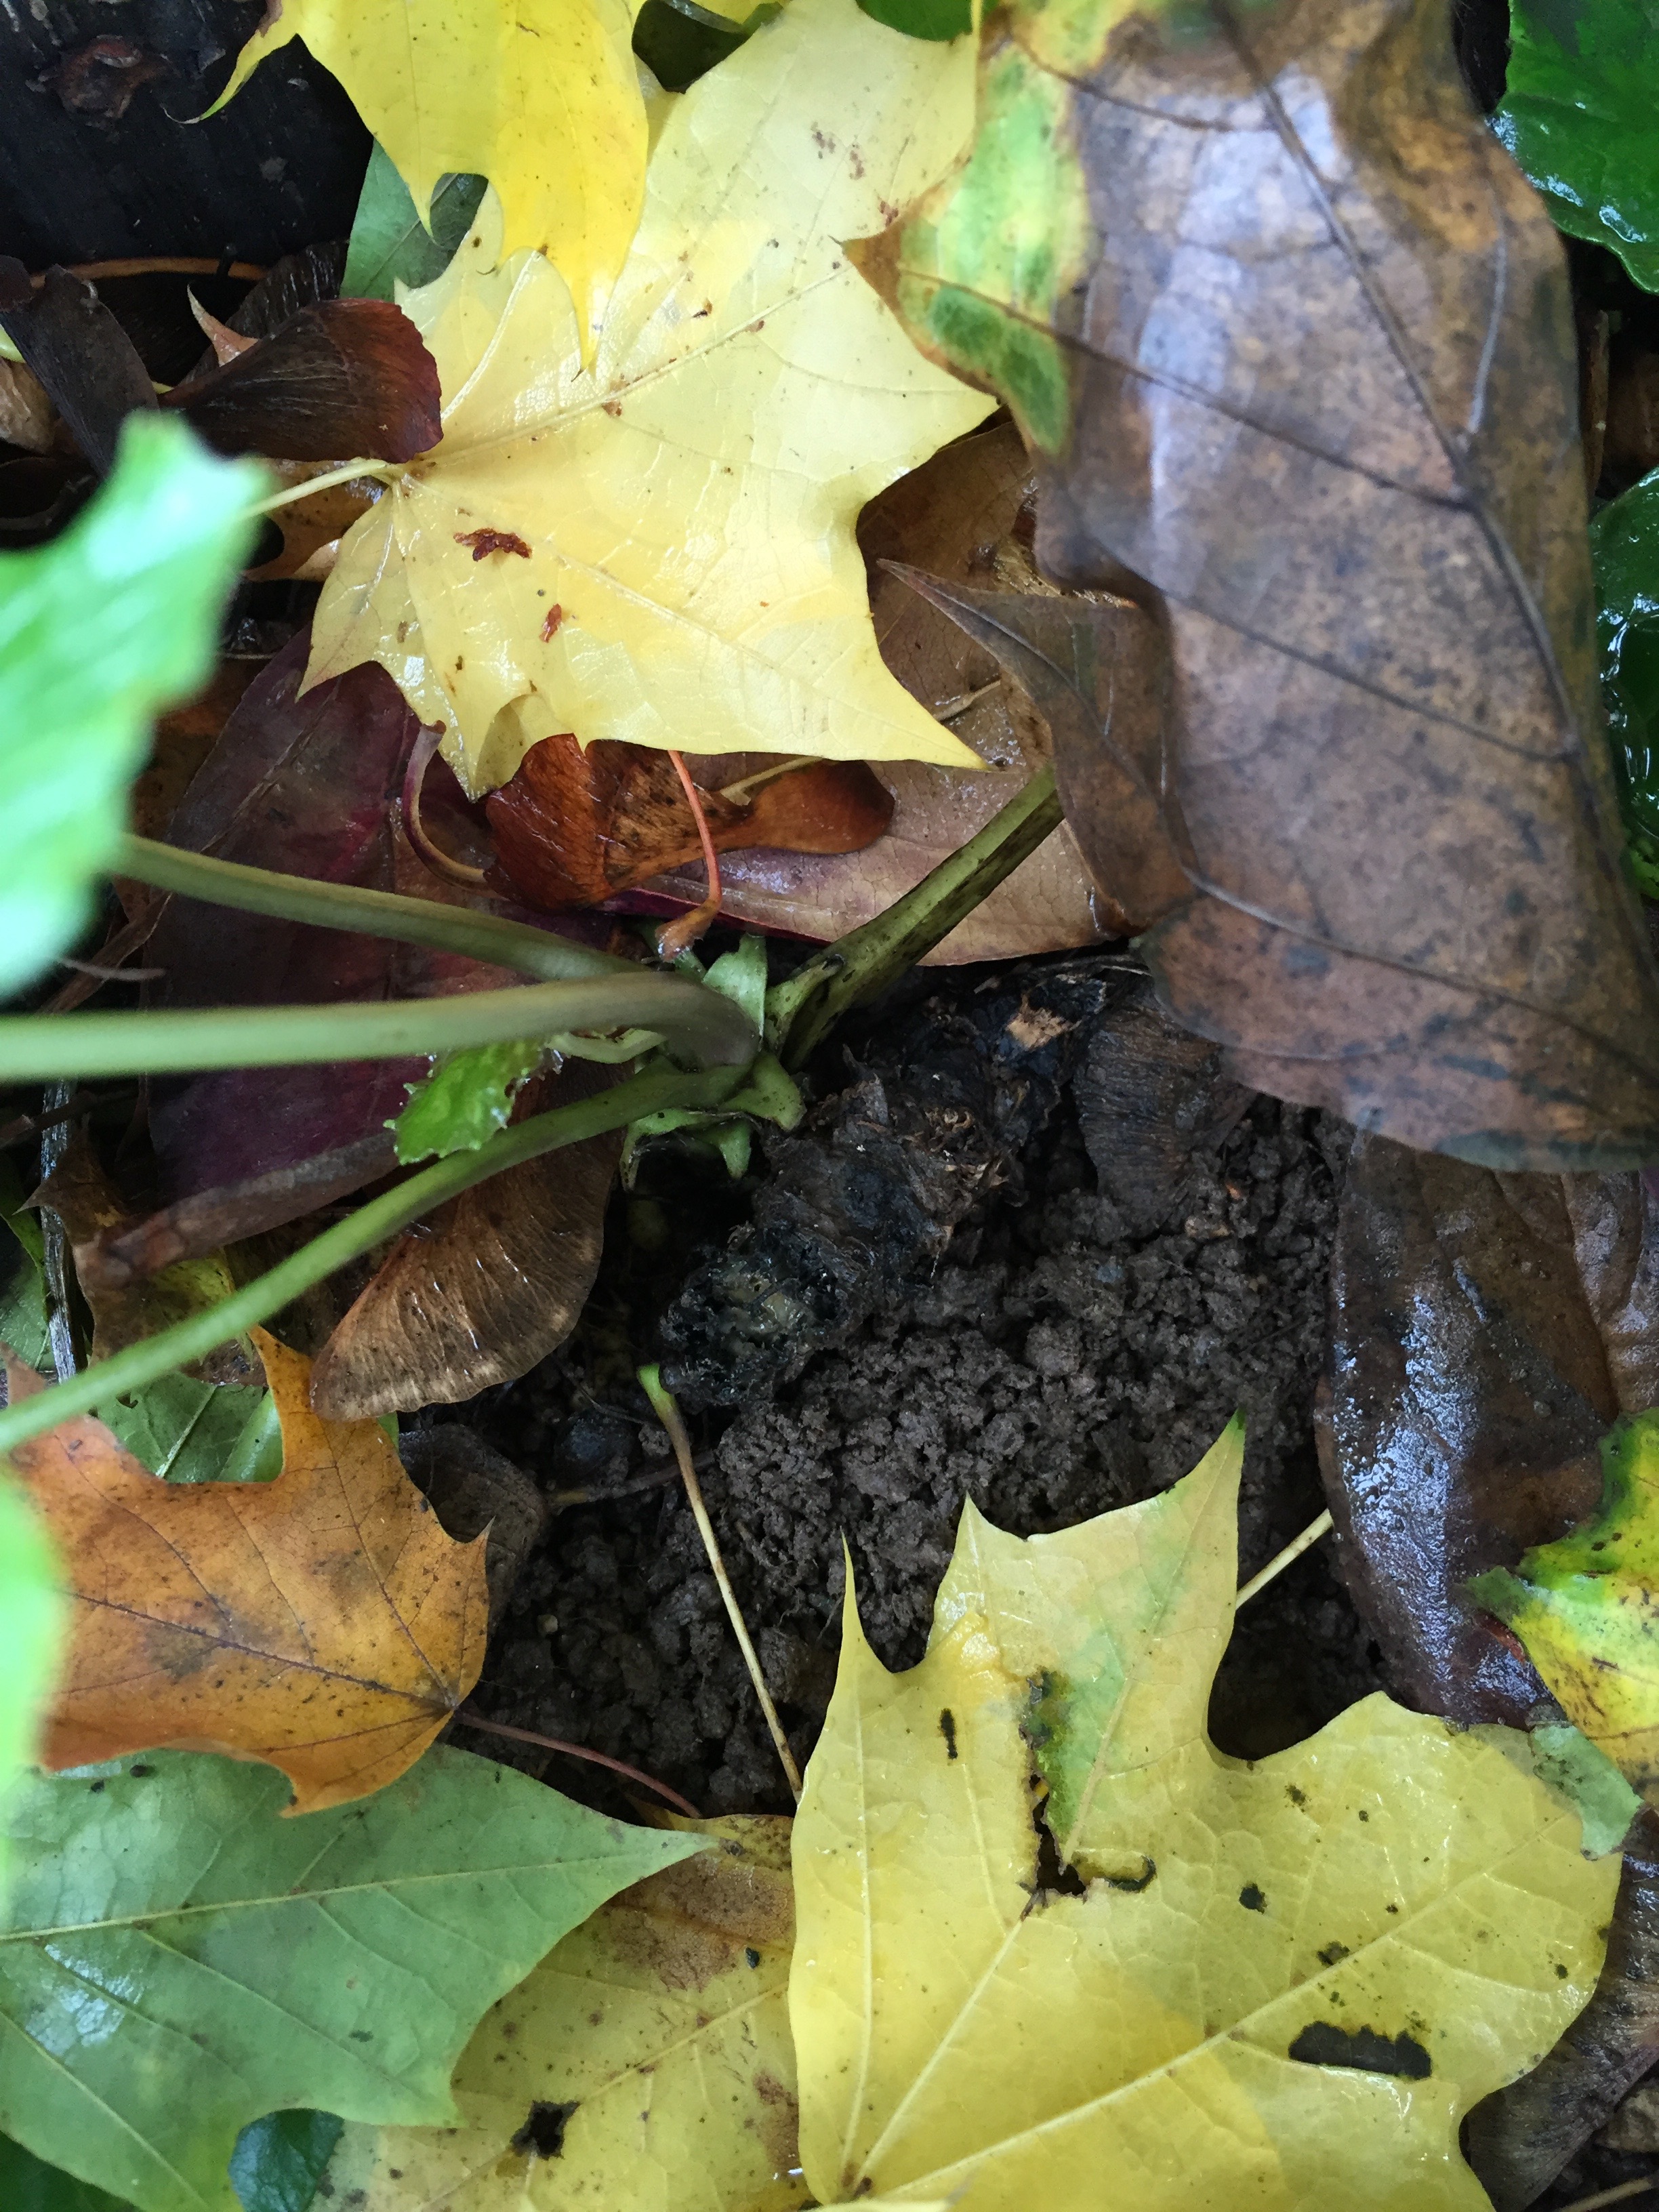
Showing one week later after the heat wave.  The small starts are dry.  The established plants have endured the incompatible conditions. 

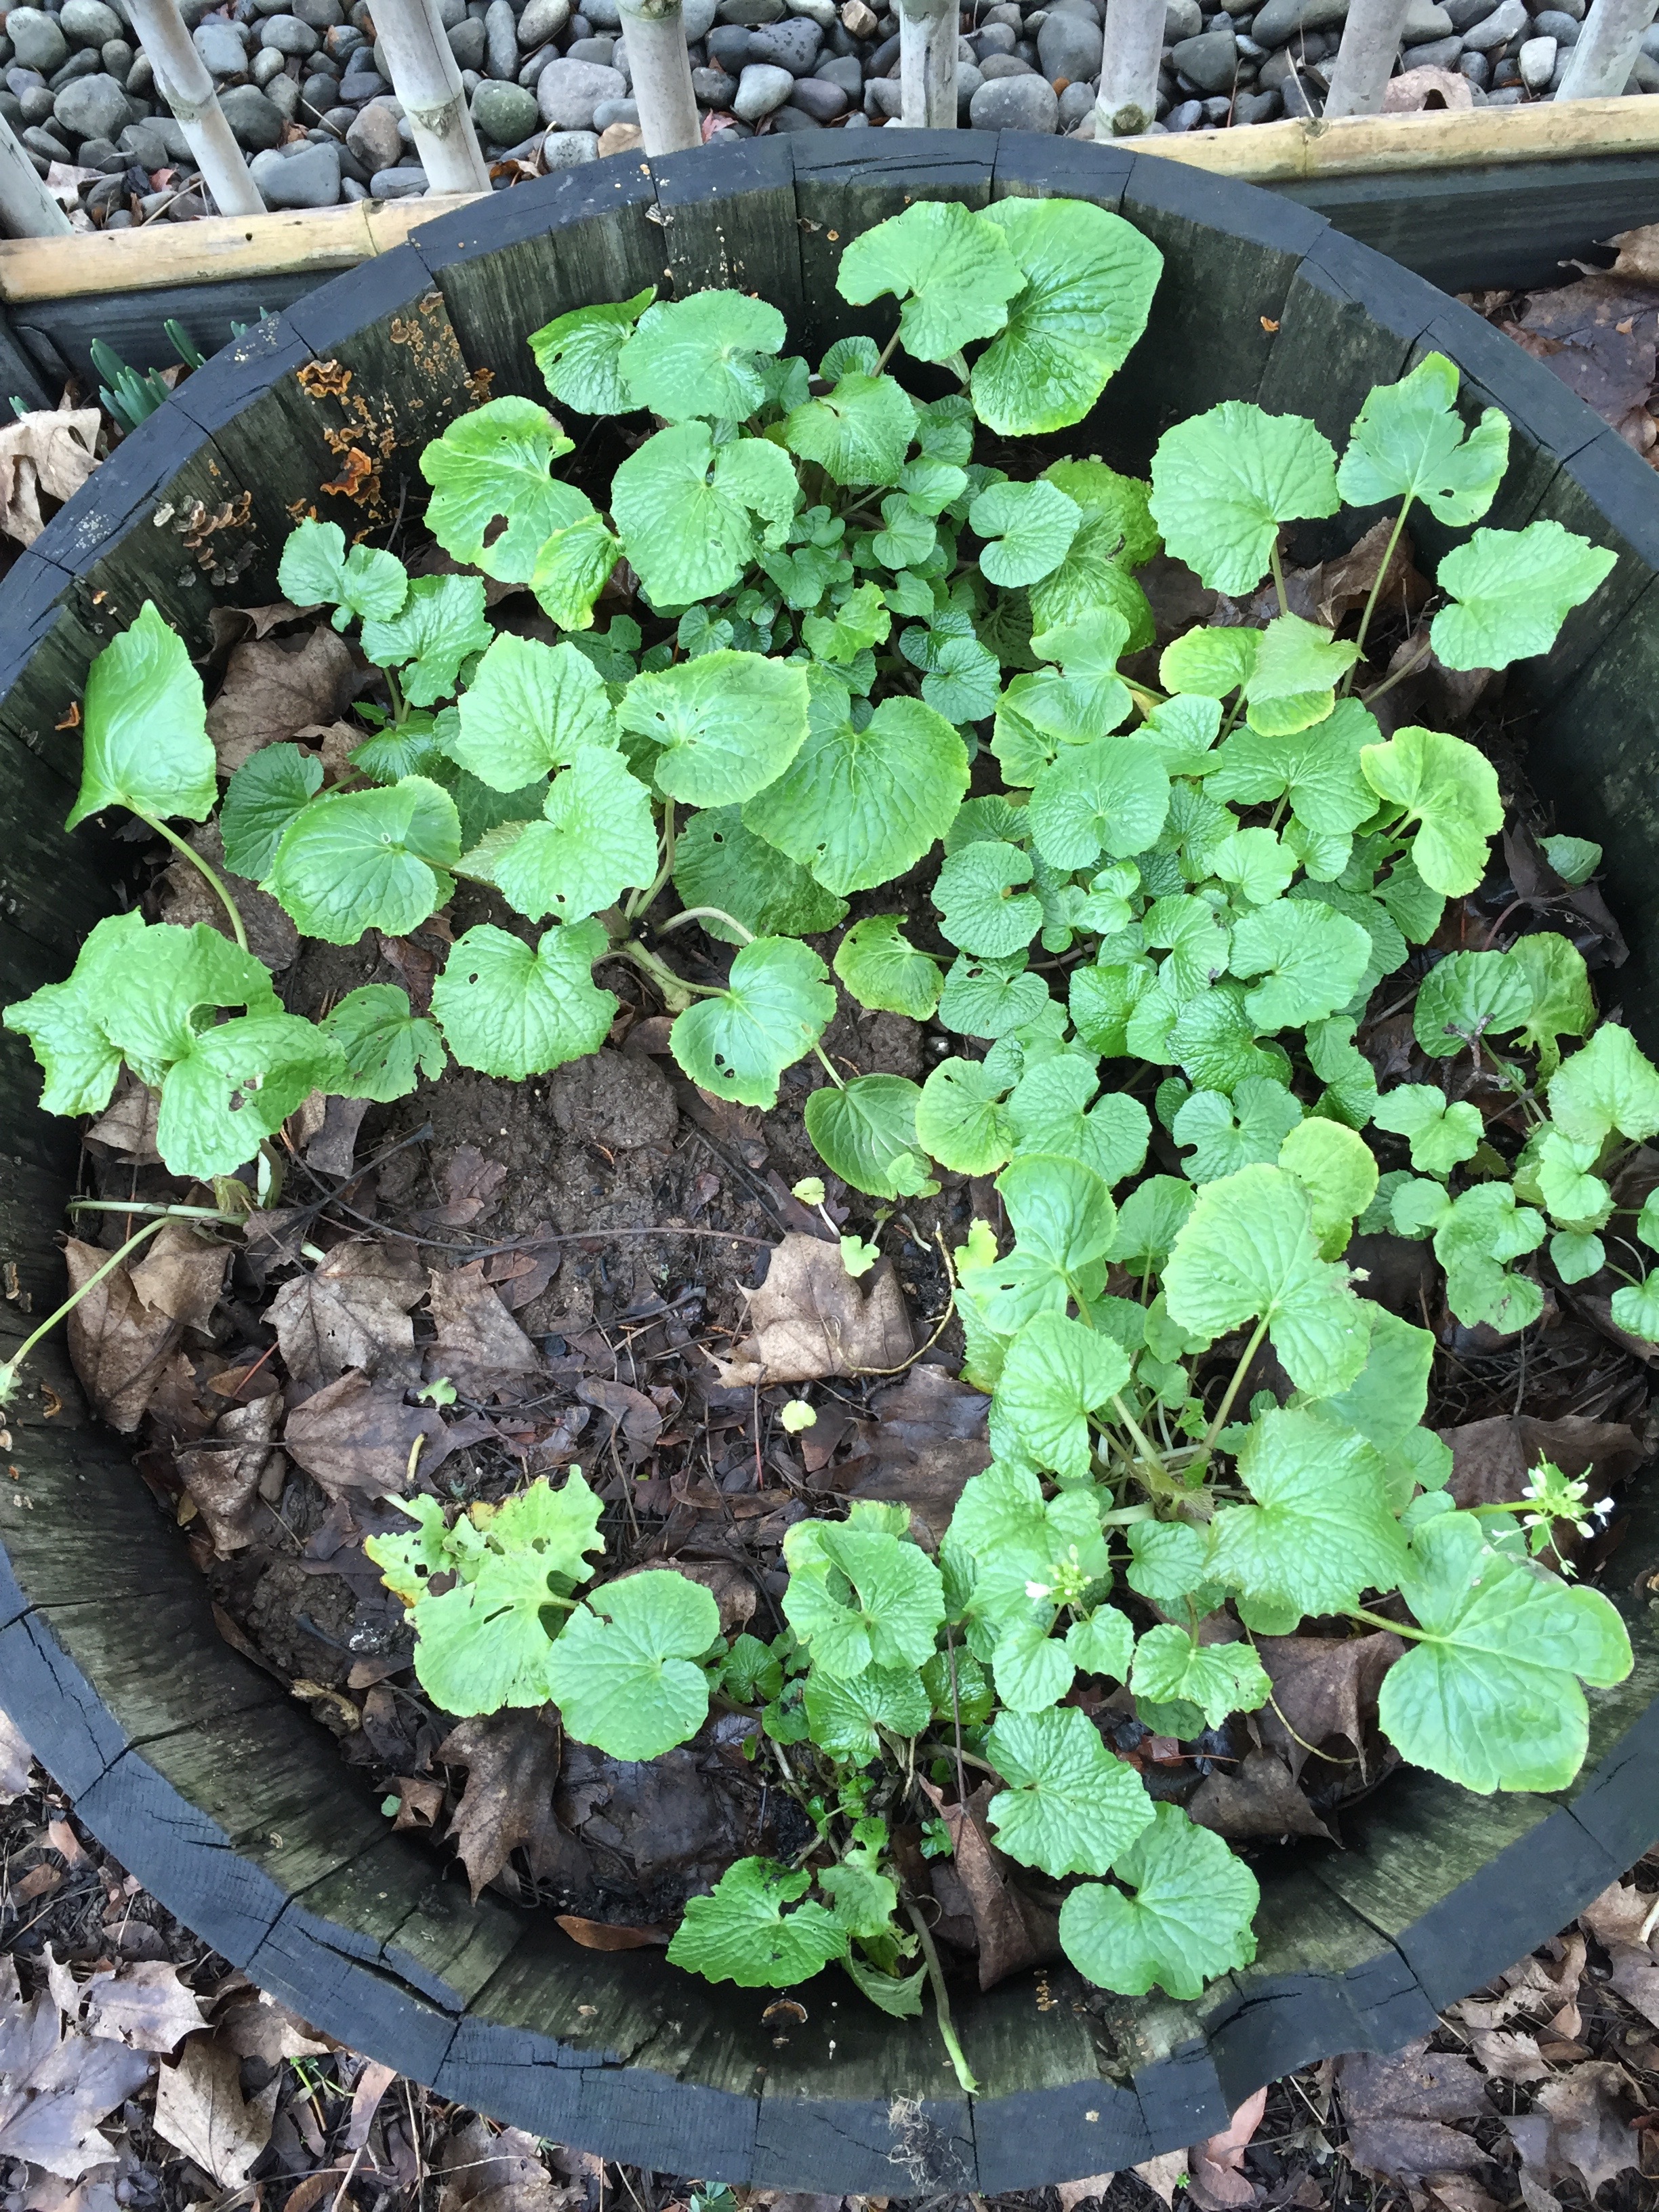
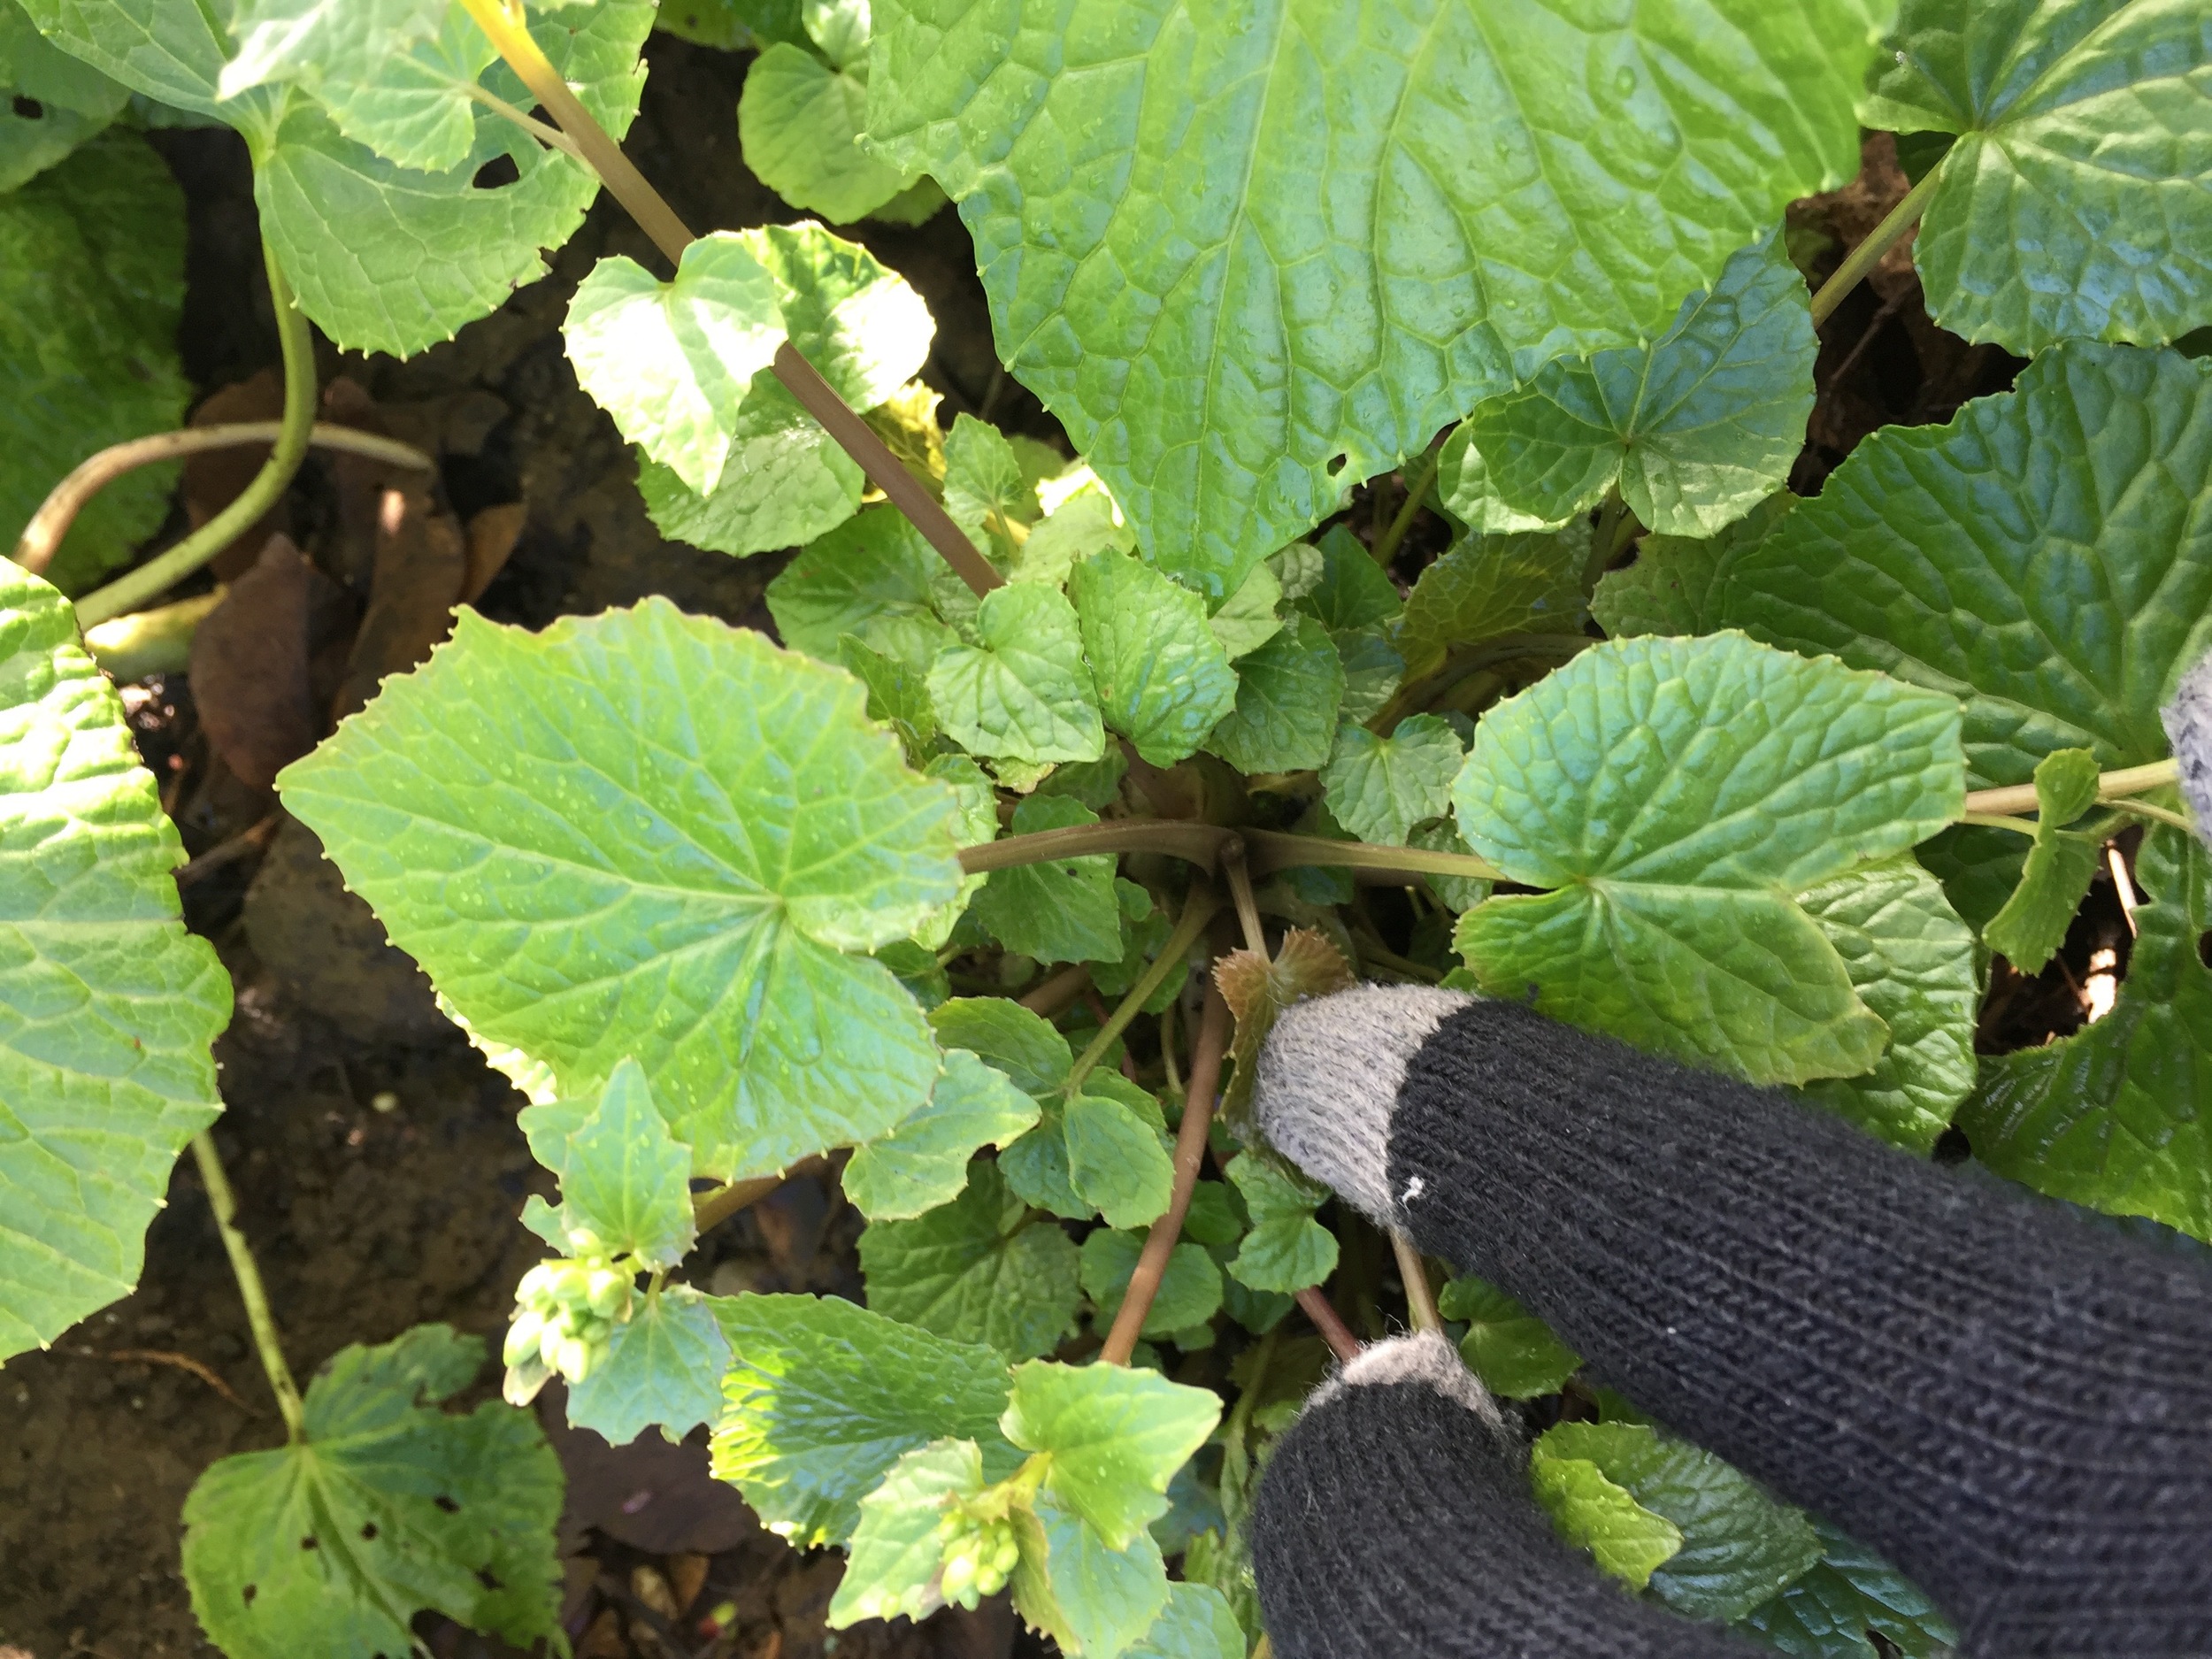
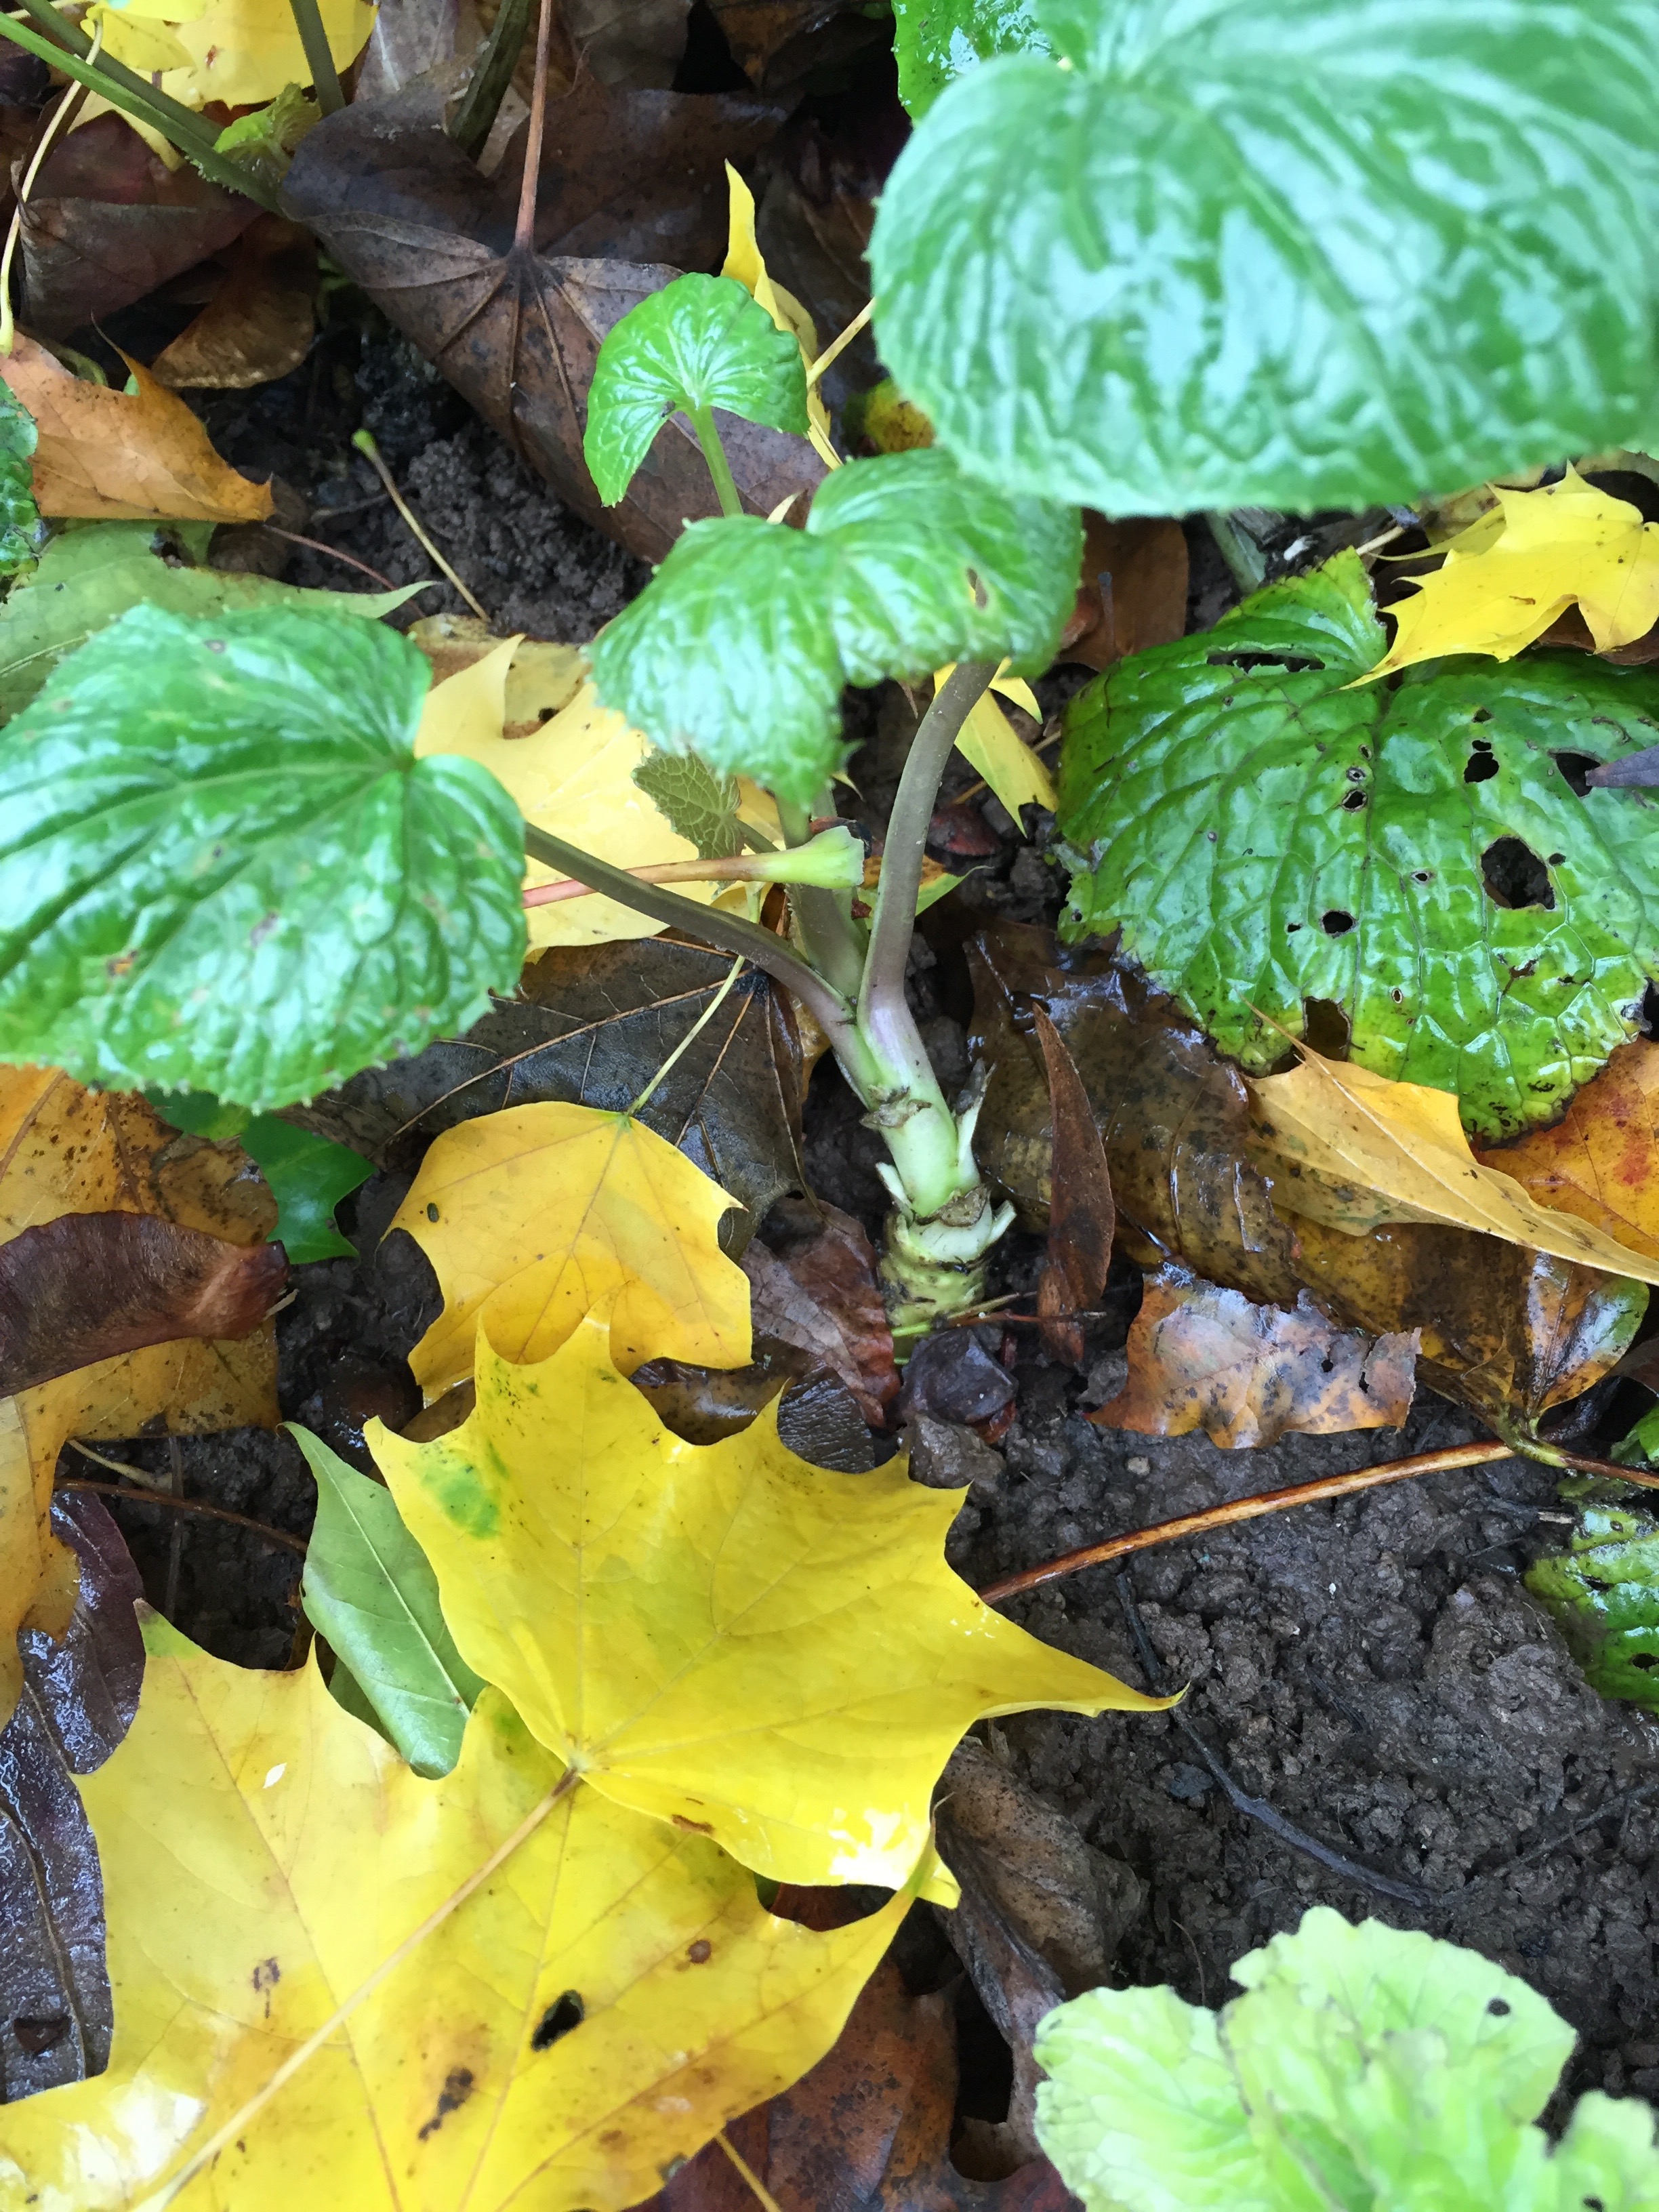
Showing apical meristem growth in an established plant just days following the heat wave.  They actually grew during this time.  

Showing small leaves in the center, the apical meristem growth again.  This week is cool and rainy.  I'll have an update on the small plant starts in about 10 days.  Wish them luck on their recovery!

Pests and Diseases: Wasabi is a member of the Brassica family. Pests and diseases of this family include: aphids, cabbage and alfalfa looper larva, crane fly larva, and slugs. The best defense against pests and disease is to maintain the cool temperatures and stable irrigation wasabi prefers. Pruning wilted or diseased foliage, hand removal of slugs or use of slug bait, and removal of aphids and other pests is beneficial to the plants health. Use caution when using any insecticidal soap or any other insecticides. If any fungal disease is detected it is recommended to remove the plant away from all others to try treating it, or dispose of the plant entirely. Copper spray can be useful in the presence of any fungal complications. 

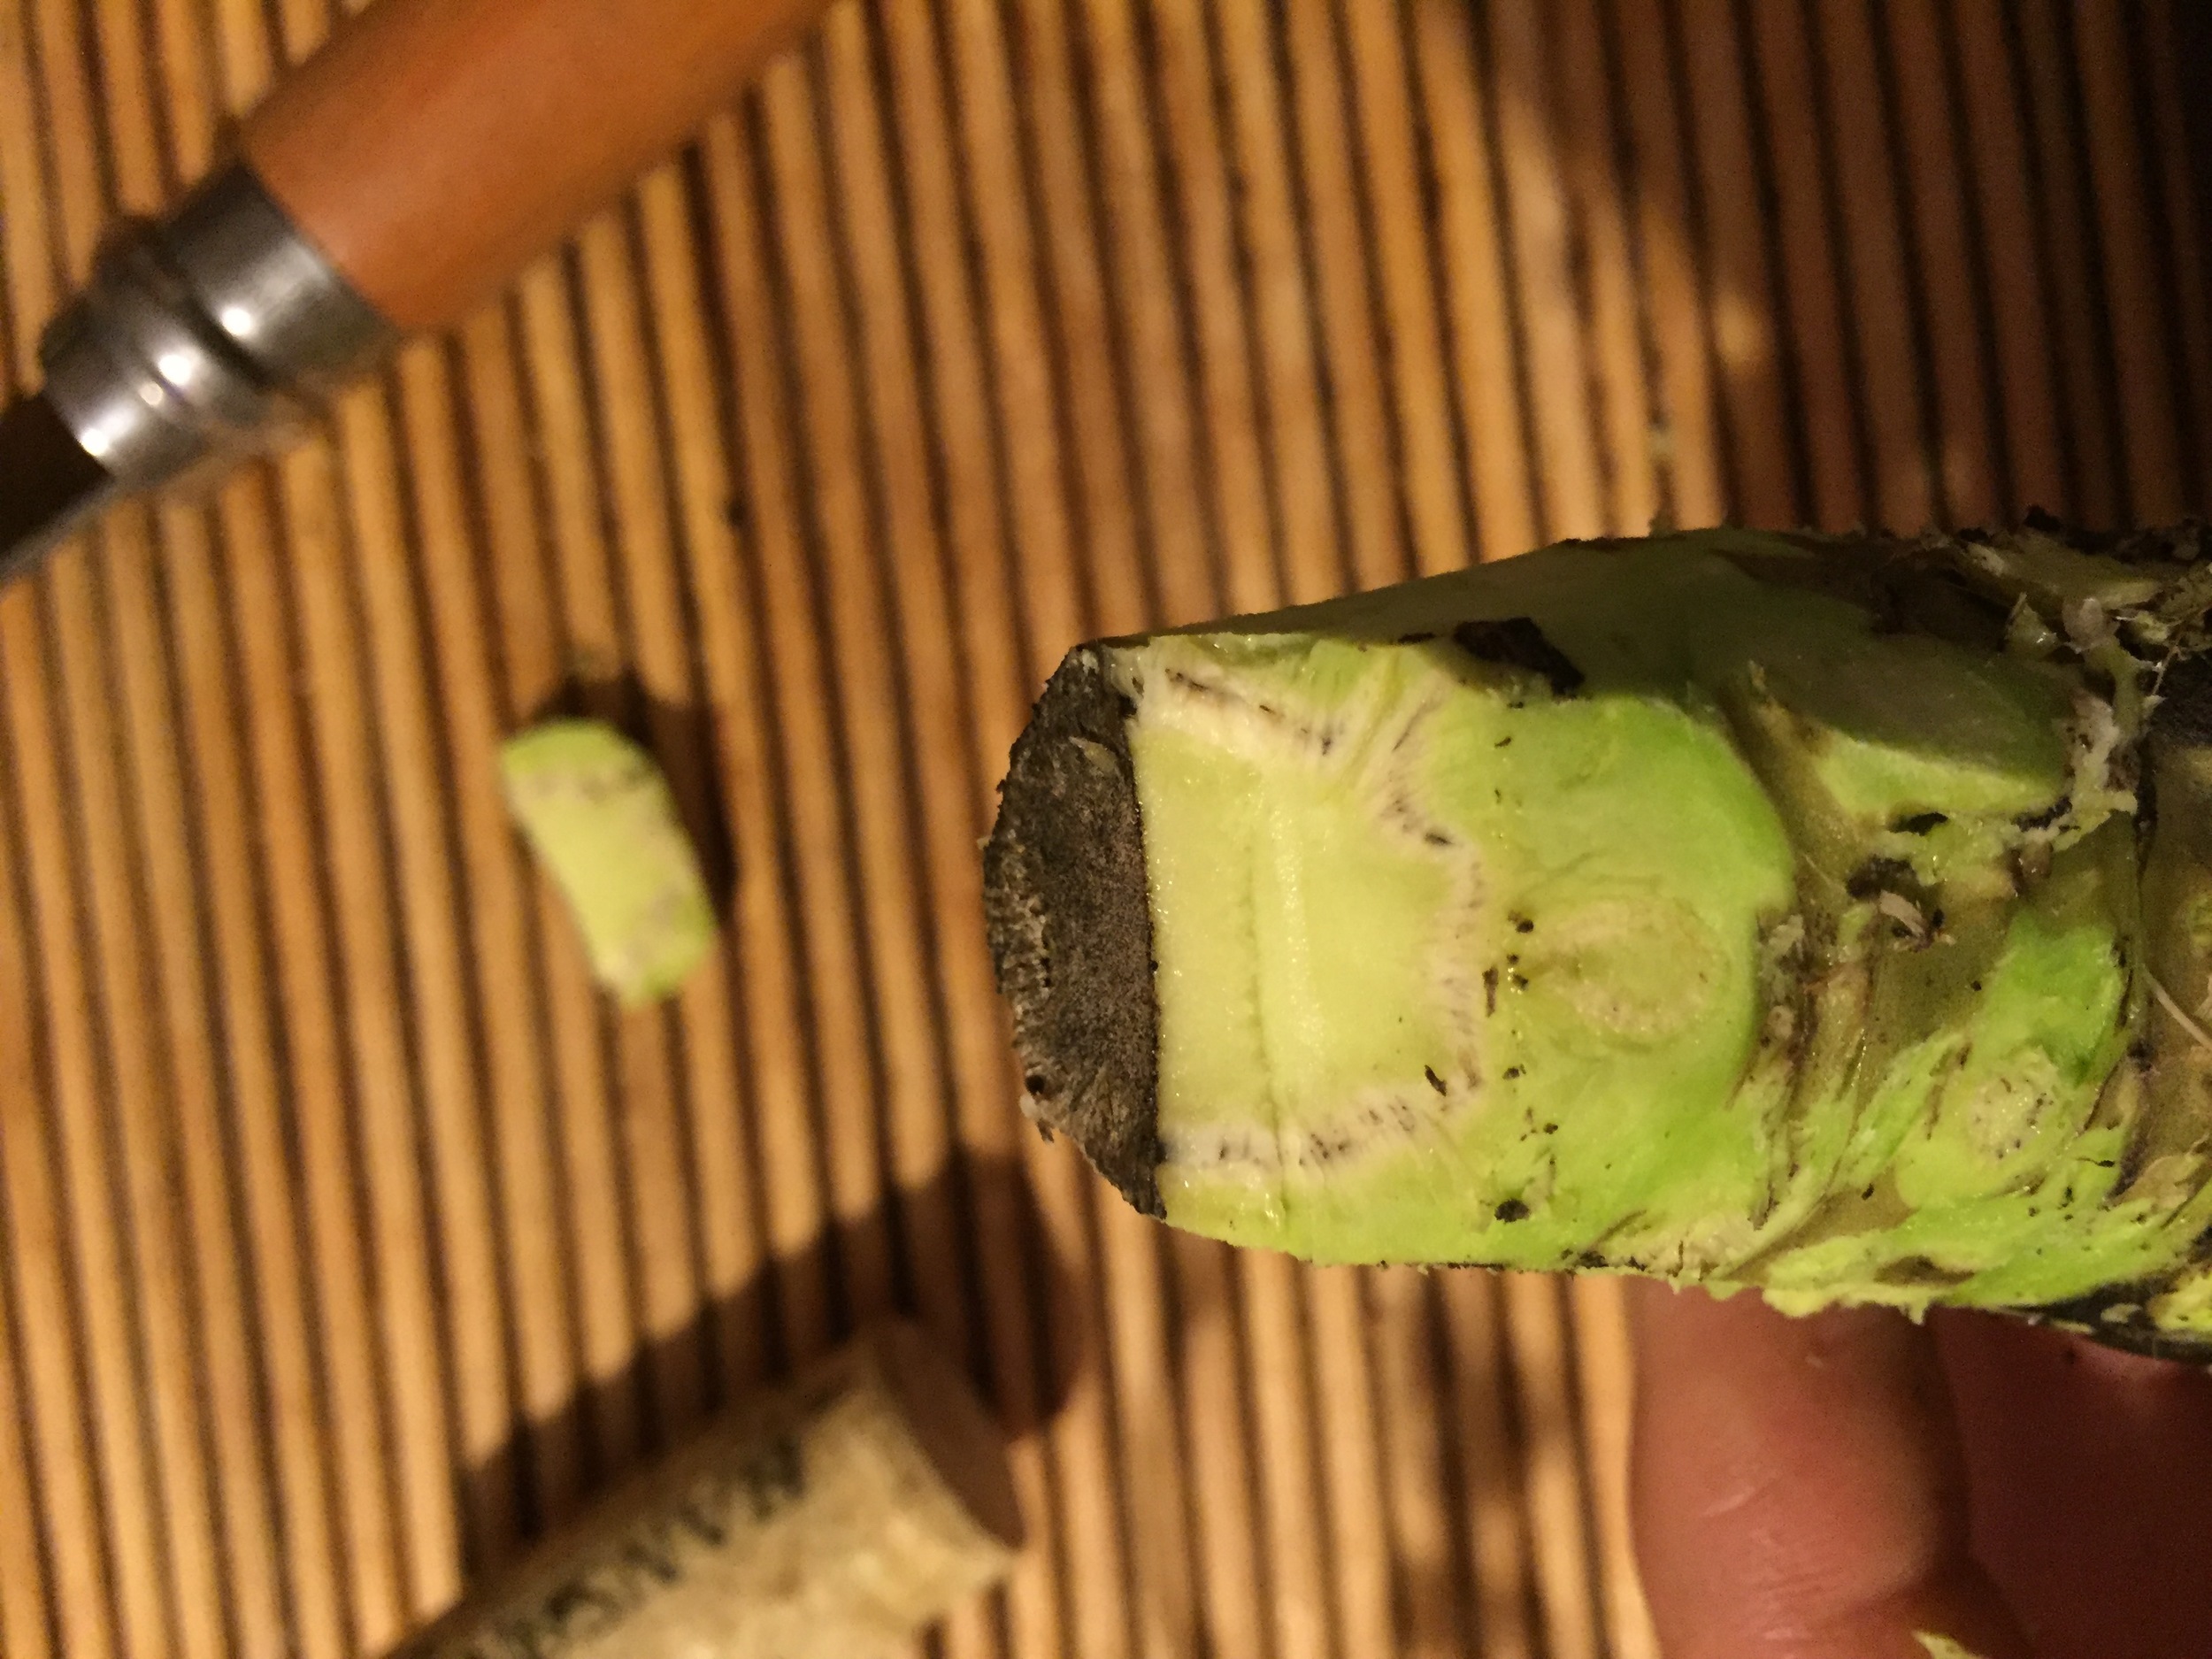
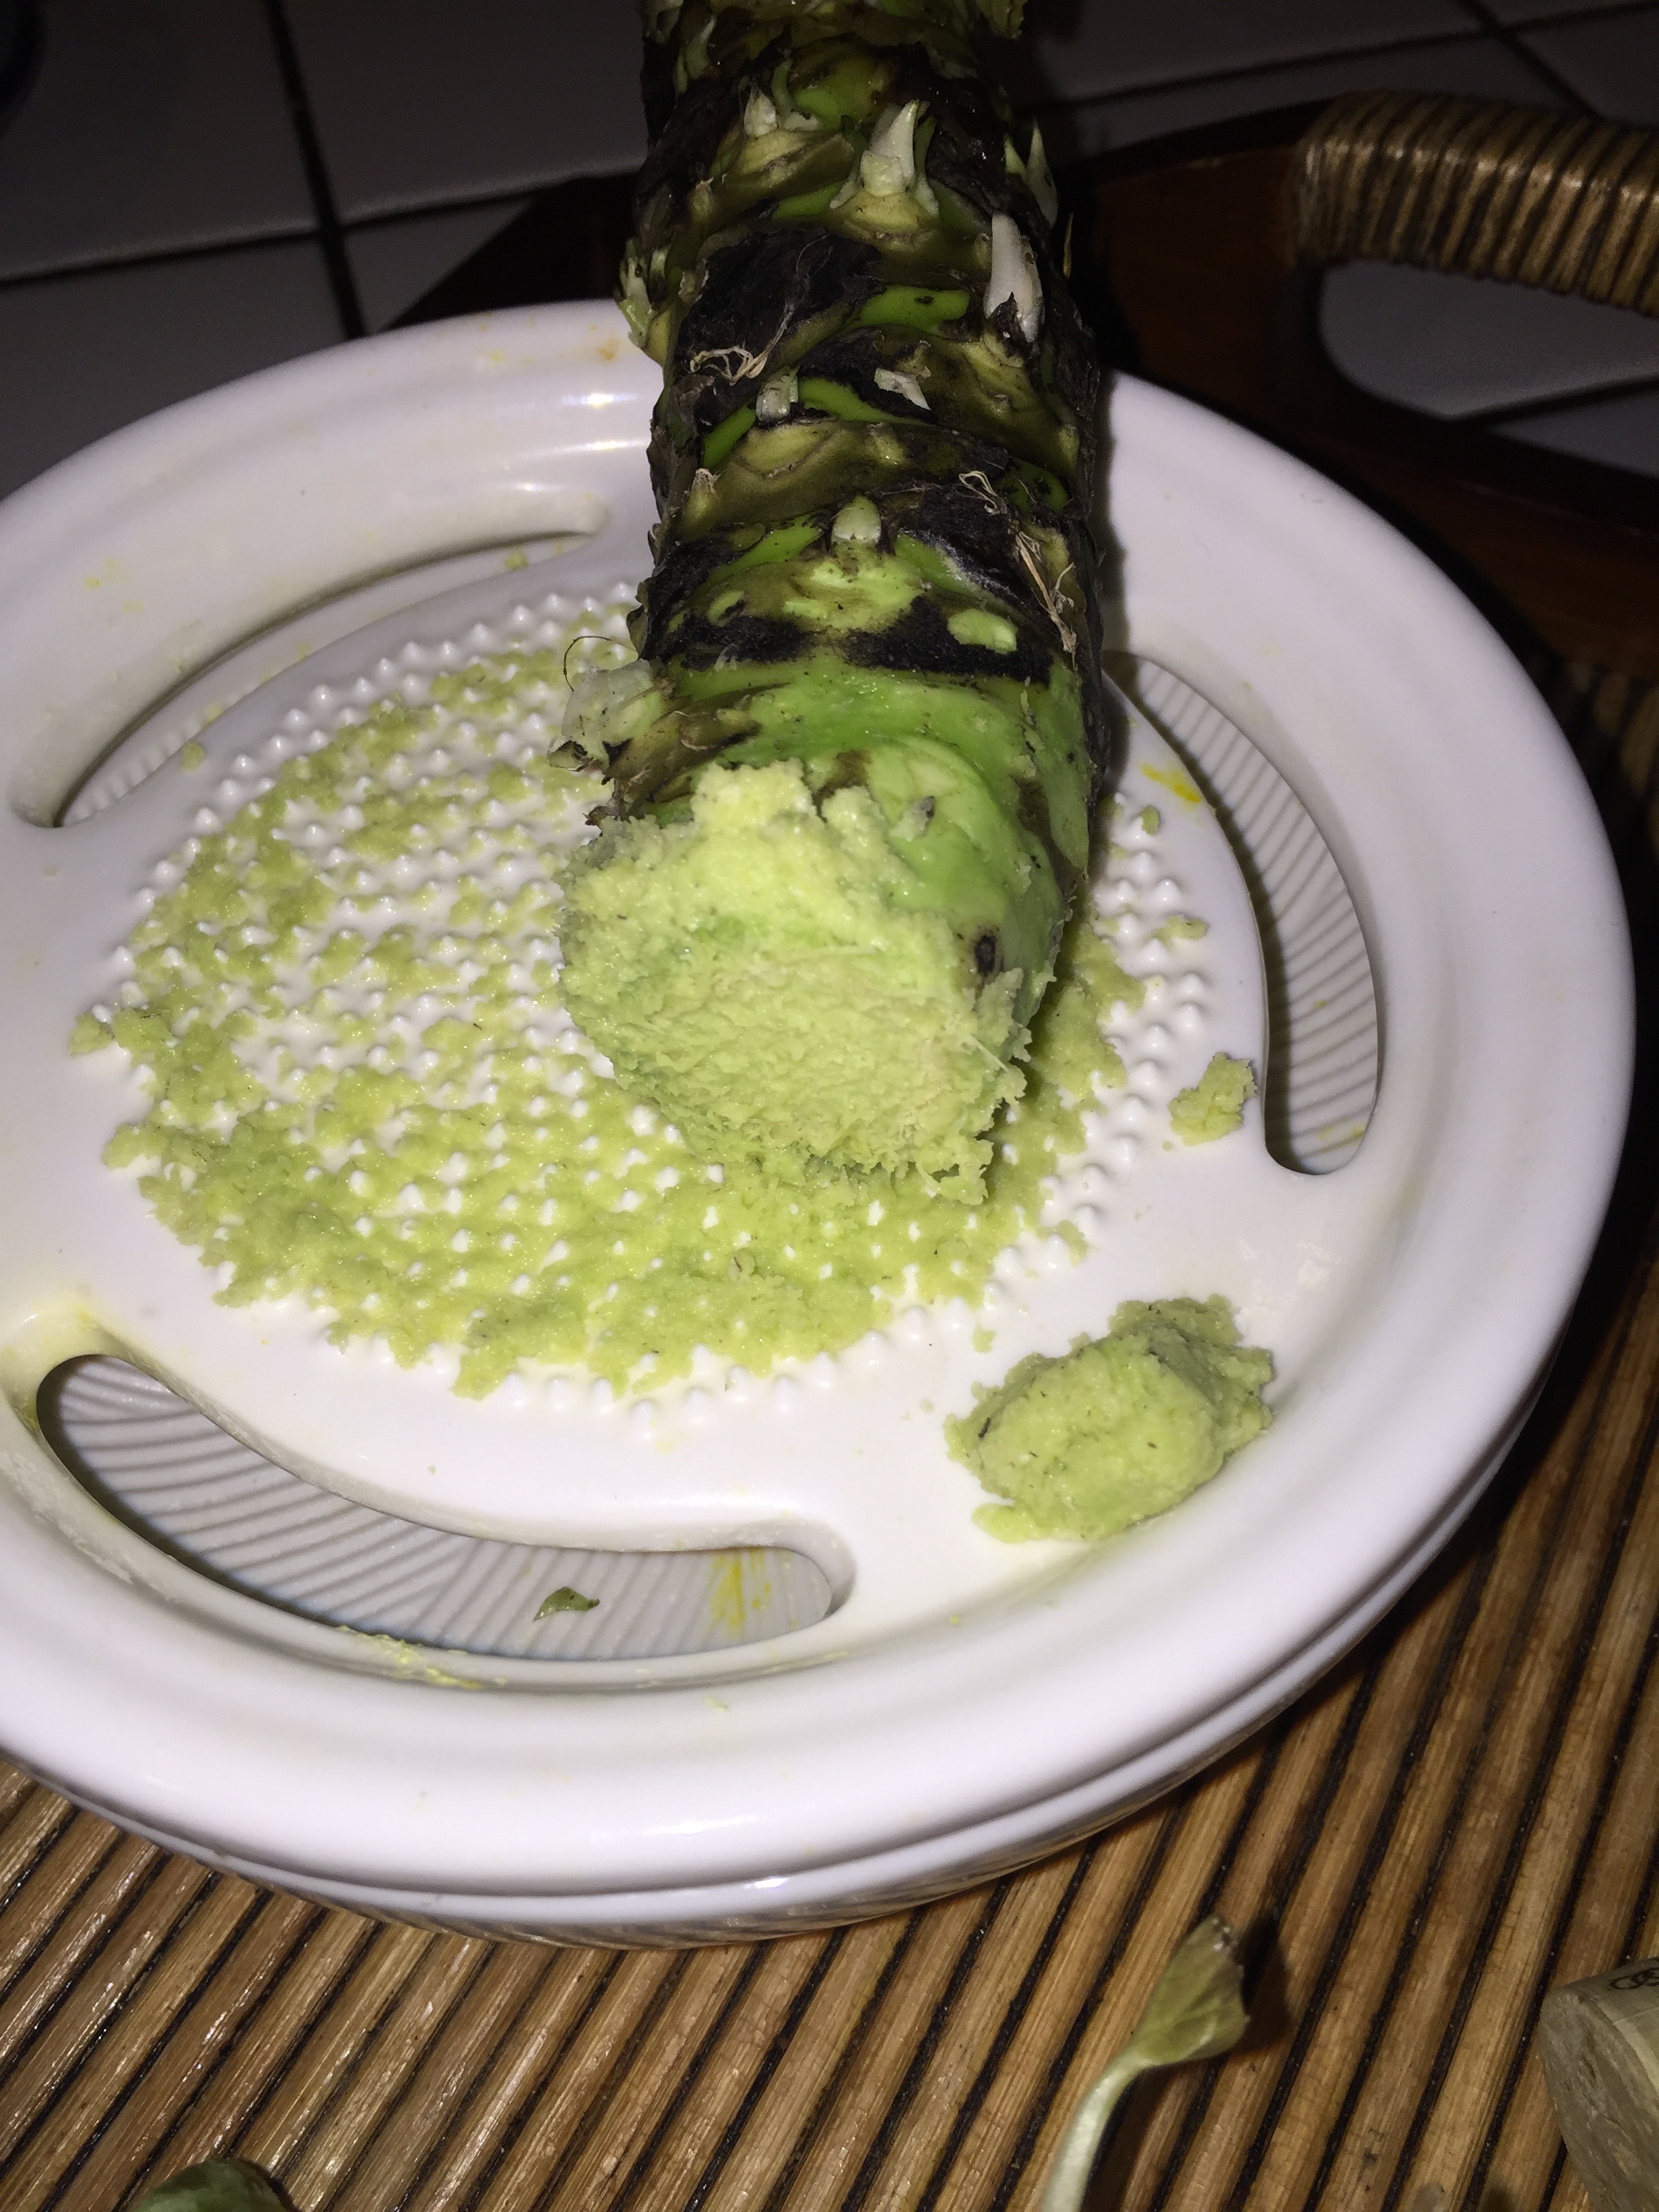
Harvesting: If conditions are optima, within 24-36 months from the initial planting, you may harvest a four inch or larger rhizome. In the meantime, you may harvest the petioles (leaf stems), leaves and flowers that bloom in the early spring. All parts of the plant are edible. However, overharvest of leaves can lead to slower rhizome growth.

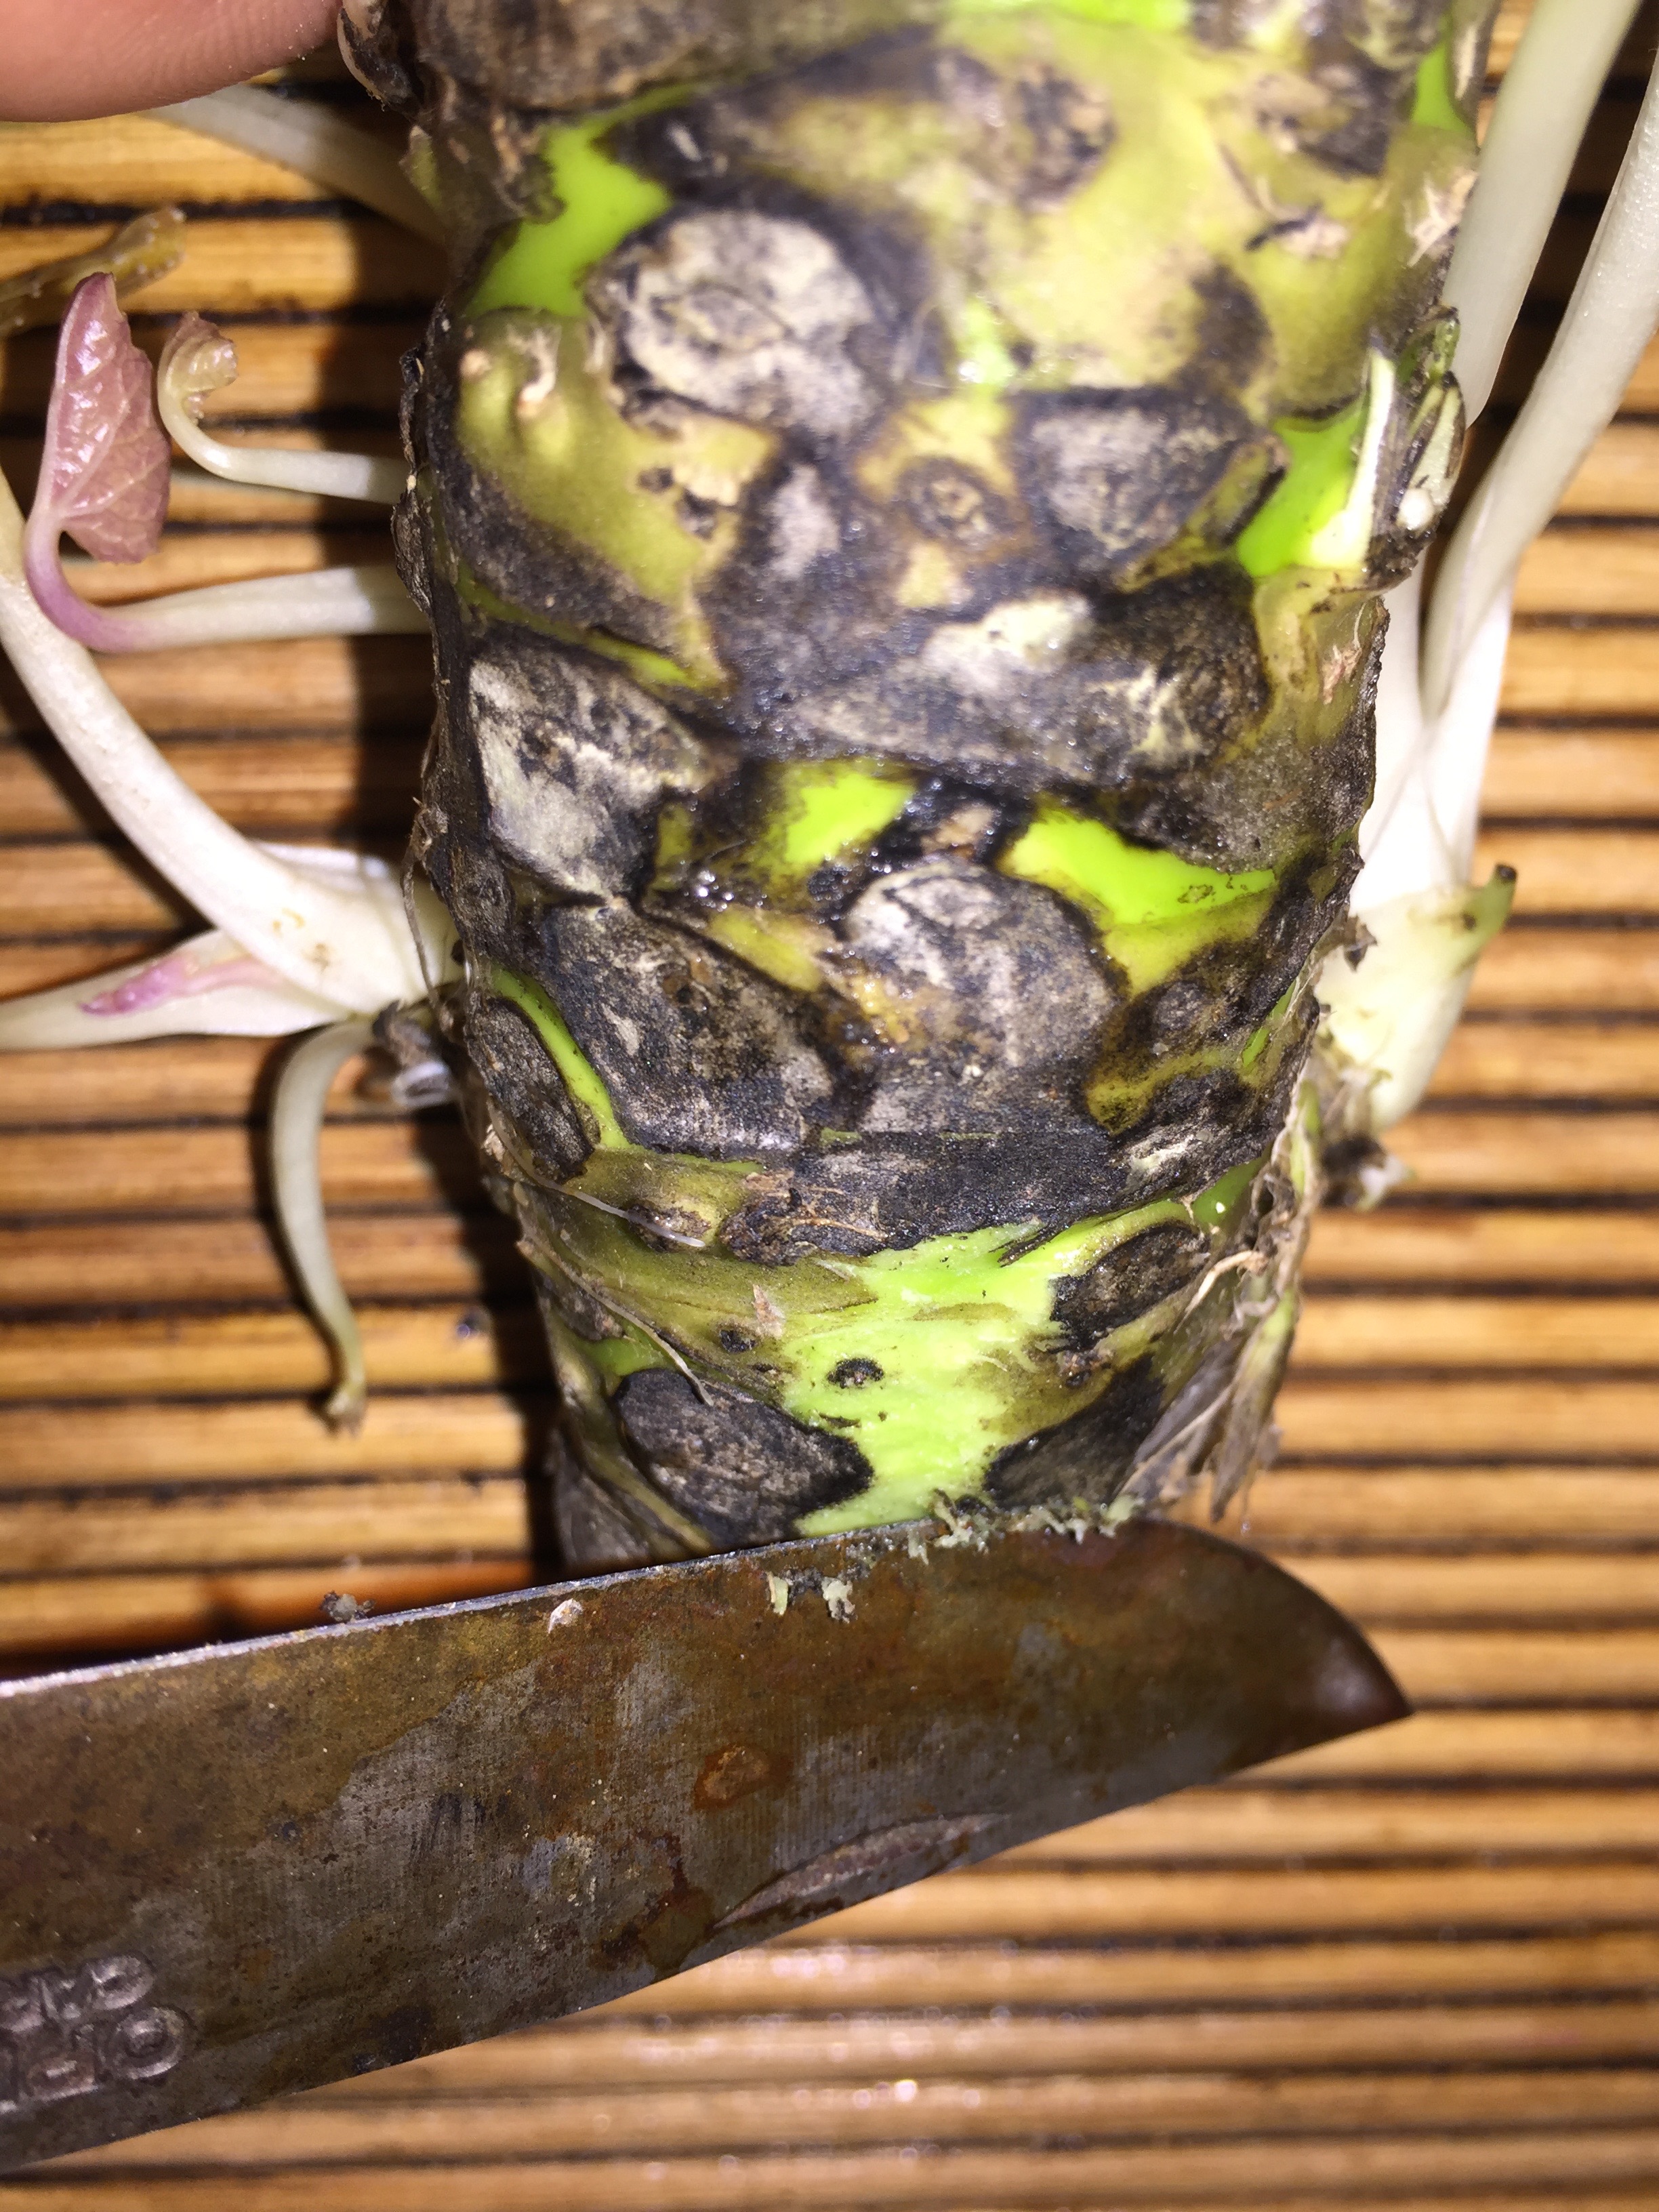
The whole wasabi plant is edible.  Enjoy harvesting and eating the leaves and leaf stems raw or cooked while you wait for your rhizome to grow!  When your rhizome is ready to harvest it is recommended to hand dig the plant out of the ground or pot. You can then remove the plantlets that have formed around the crown to be potted or planted and expand your wasabi crop. Trim away the roots and stems and enjoy your fresh wasabi.

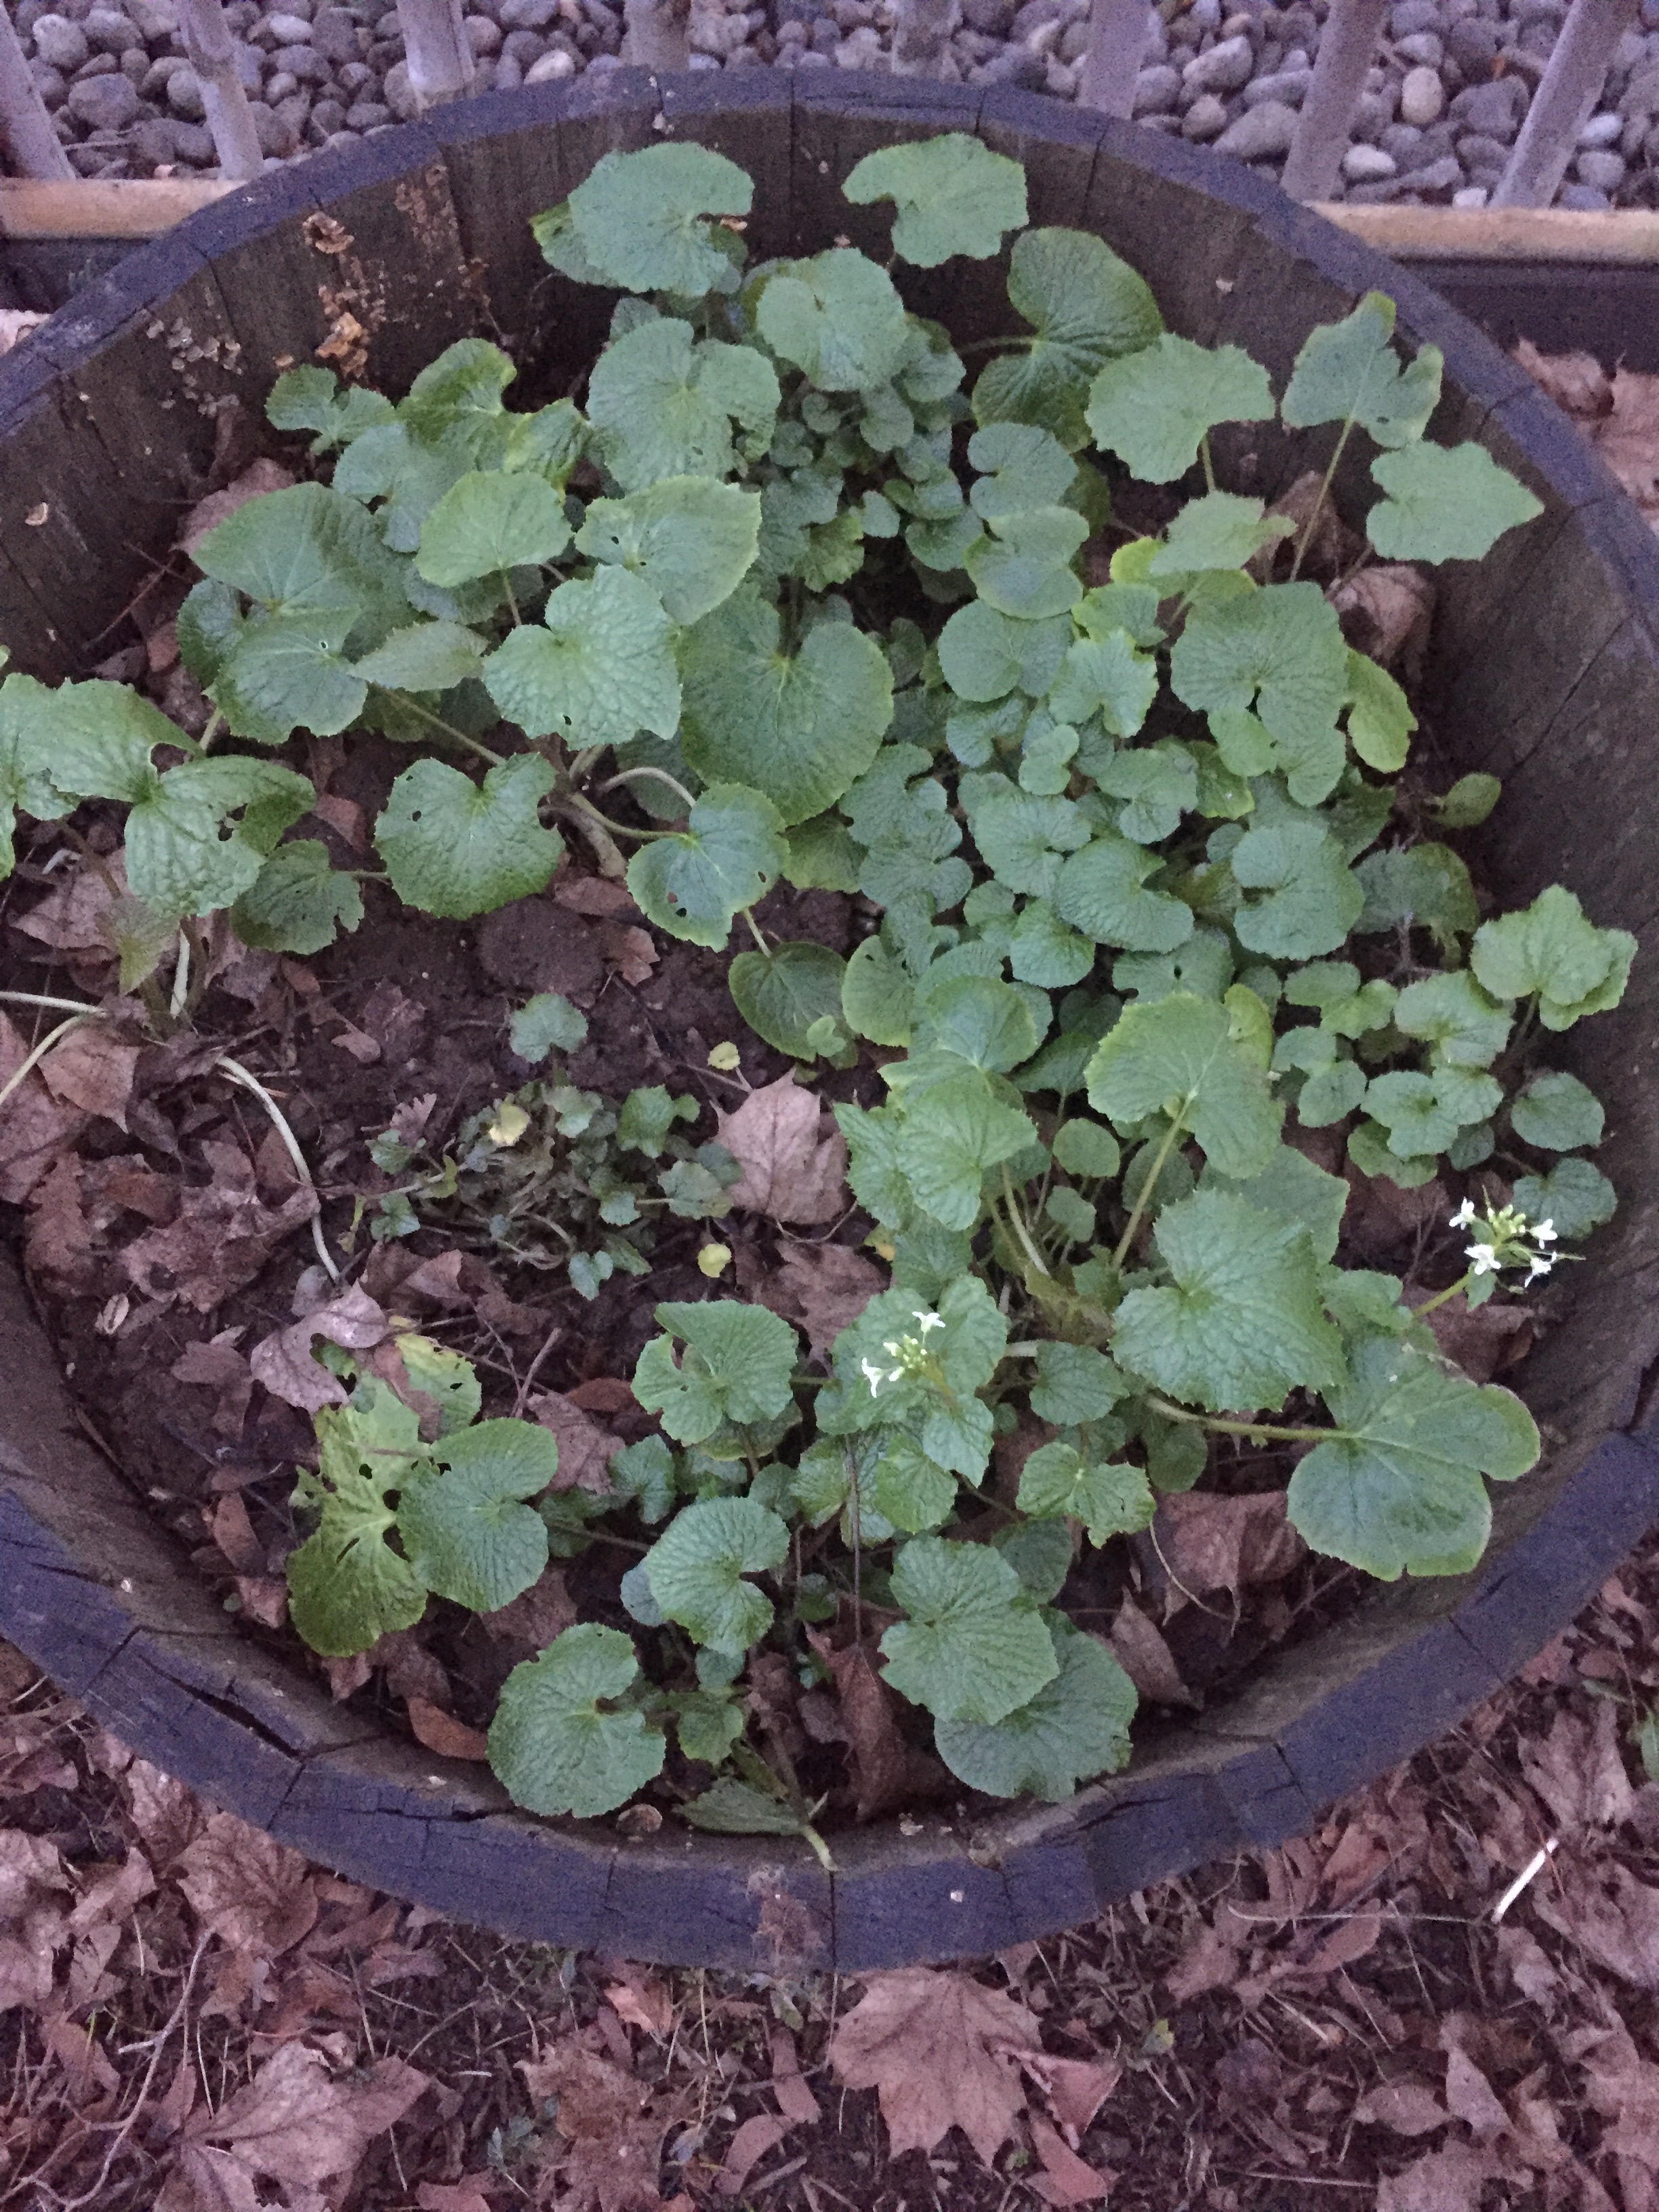
Update: Late September 2016.  The plant starts that had no leaves all died.  I've not seen such a rapid demise.  This was because I planted both on the hottest week of the year and with some direct sunlight.  The plants simply were brought beyond their tolerance at such a young age.  The other plants continued to grow and are thriving. Lesson: if it's too hot, keep the plant starts in the refrigerator or initiate them outside the garden and wait for a period of appropriate days. 

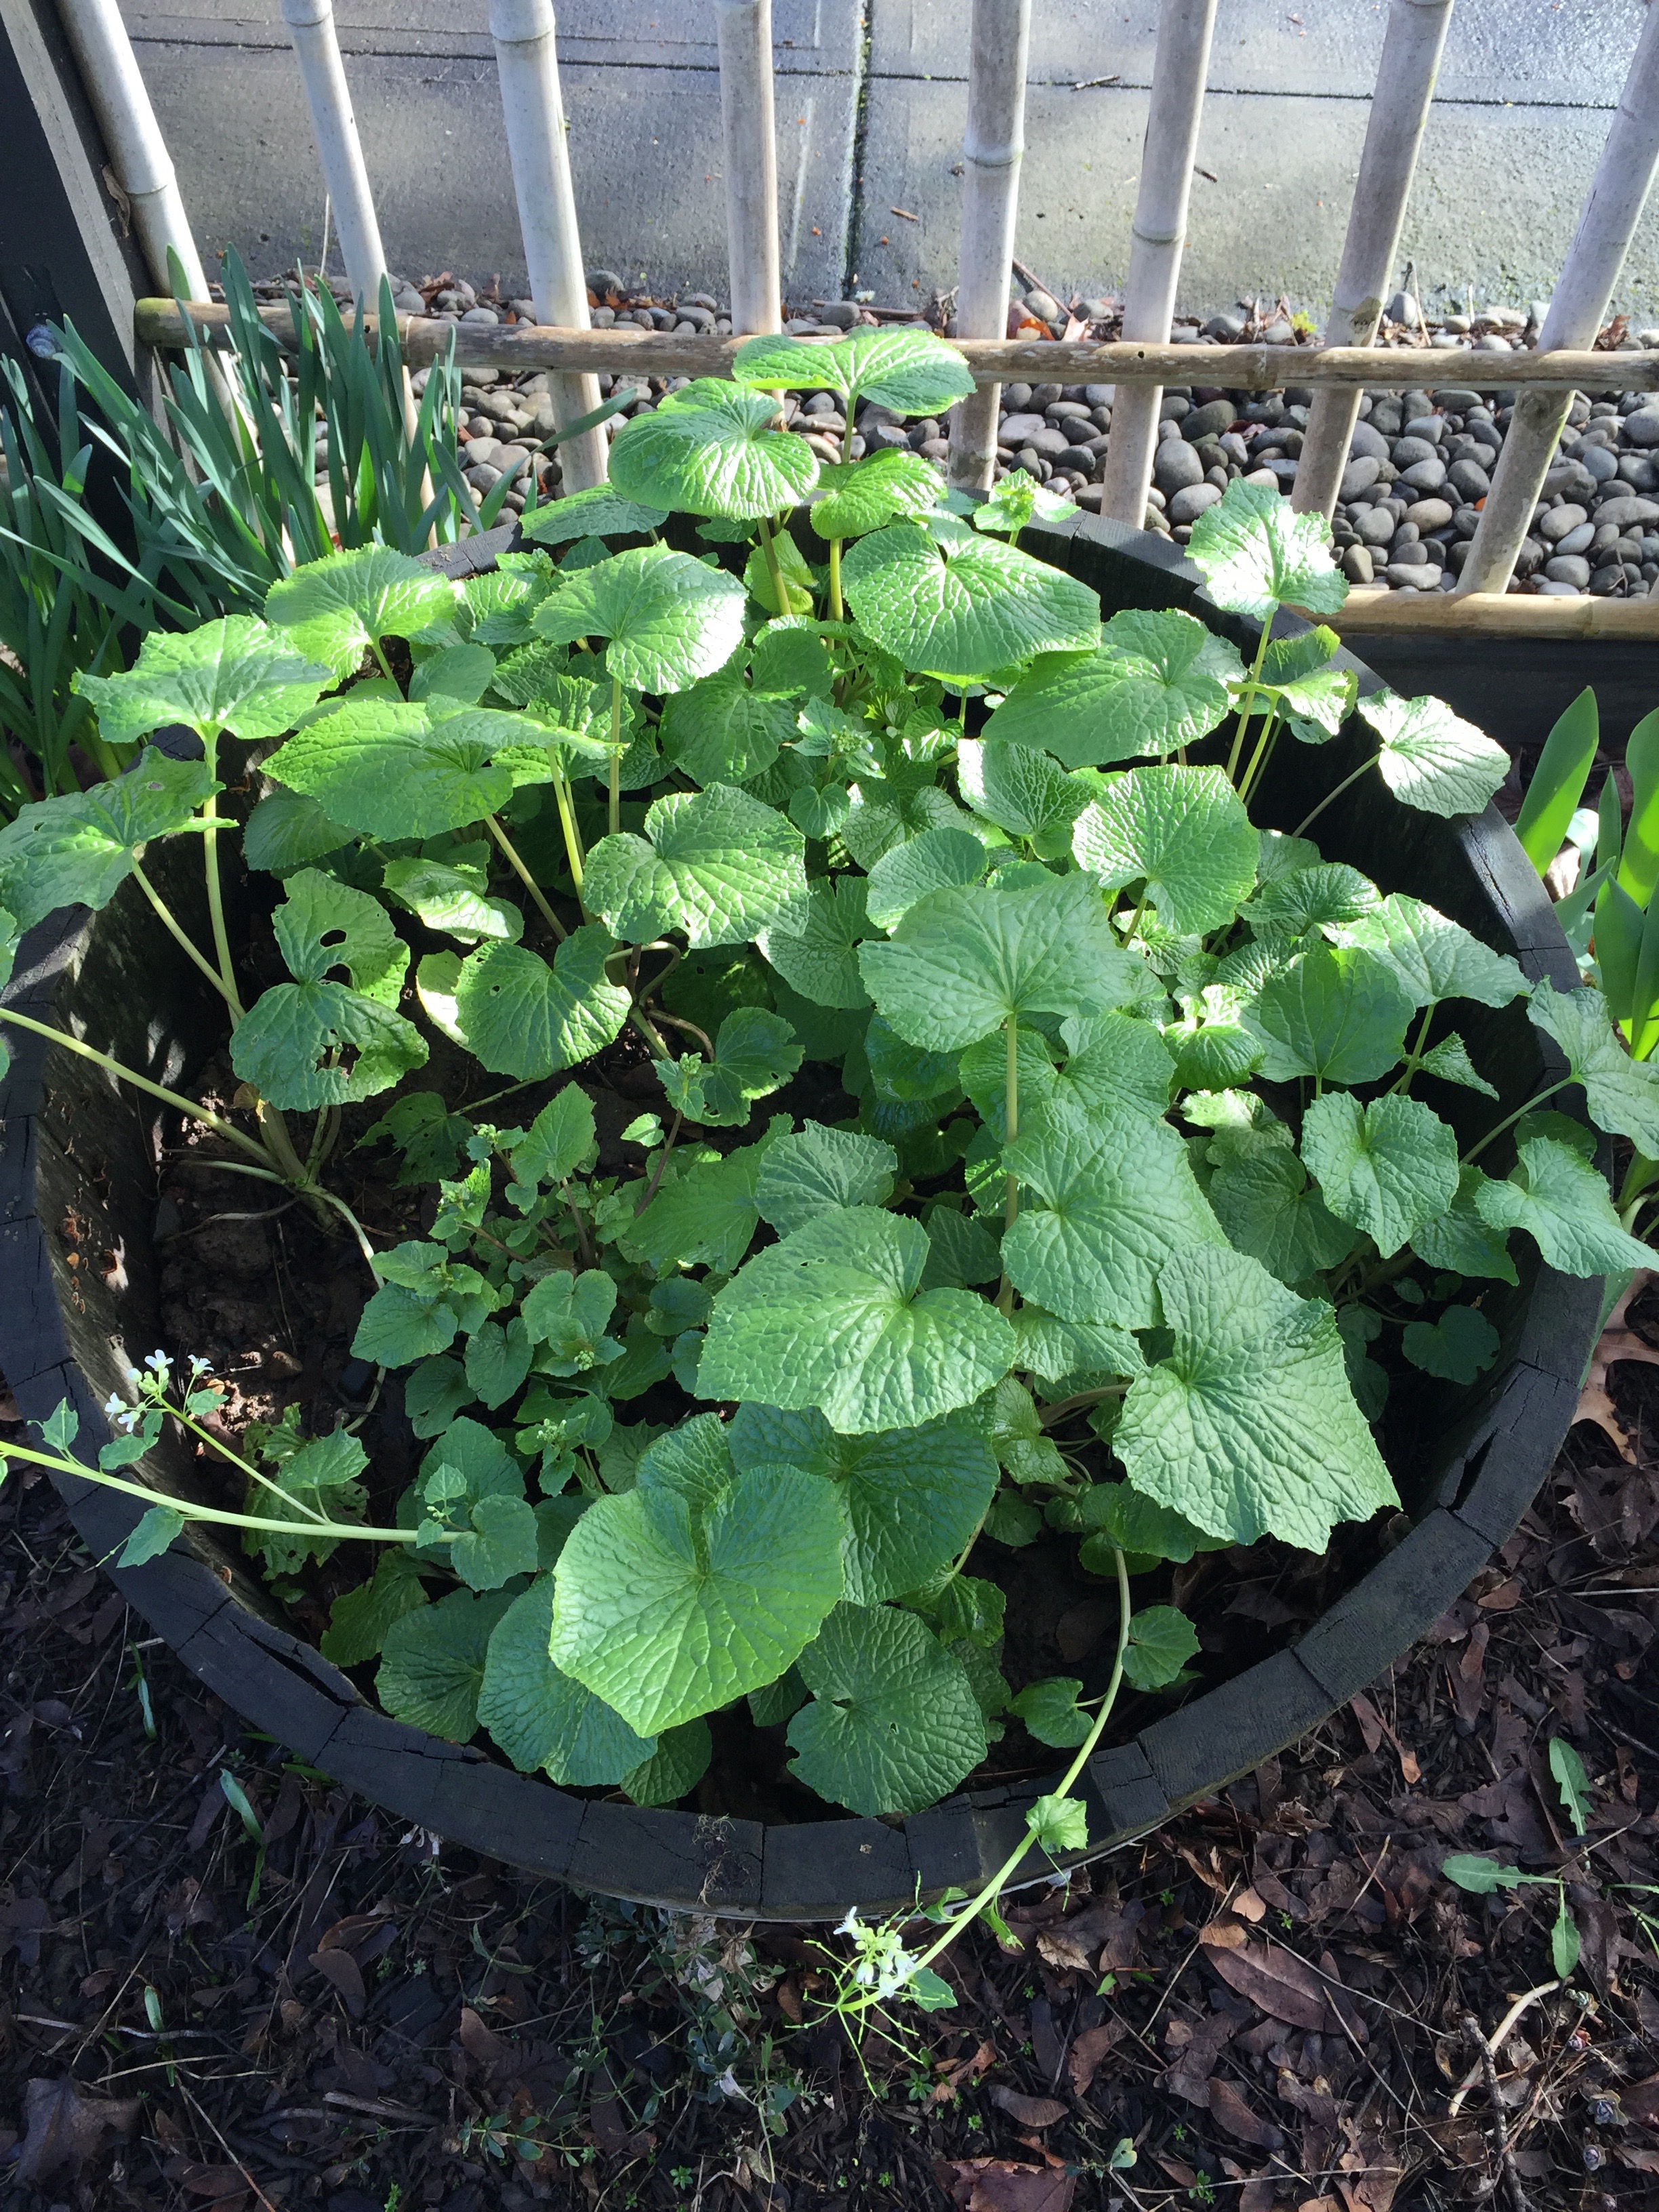
This photo was taken on the same day as the above.  This plant was started in the pot and, though planted at the same time (hottest day .....), it is continuing to grow.  

Posted on September 1, 2016 .

Garden Plant Starts - A Photo Chronicle

The leaves, stems and flowers of garden-grown wasabi plants are perfectly edible.  Wasabi is a brassica.  So, like kale, the leaves and stems on the side can be removed / snipped off and eaten while the plant will grow from the top (apical meristem).  The examples shown on this page were grown in the Willamette Valley in Oregon (Plant Hardiness Zone 8a.), not on the Oregon Coast where the Frog Eyes Wasabi Farm is located.  We wanted to approximate a laissez faire gardener environment, with no special treatment, hot and dry conditions in the summer and cold in the winter (relative to the Oregon Coast) to test the plants' response.  They were planted in September, 2014 and the foliage shown is in March 2015.  They were grown in well-drained soil with approximately 20% gravel and the remainder soil and compost.  A bit of 14-14-14 lawn fertilizer was applied once per year. They endured an ice storm in November 2014 and snow in December 2015. Below is a photo chronicle of these garden wasabi following the Dec. 2015 snow.  (Note, this is a Pacific Northwest snowstorm.  The likes of which much of the rest of the country would hardly take note.  The temperature was only ~30dF/-1dC and the snow was only a dusting.).  I'm showing this as a reference to those that want to know if the wasabi plant can survive a freeze.

Garden Wasabi Dec 2015 snow

Here are the same plants one month later on Jan. 30 2015.  Observe the new growth in the small leaves in the lower canopy.  Also observe the vacant space that one plant died last summer during the PNW drought. (I did replace this plant in later photos.)  Also observe the first flowers in the lower-right corner.  These plants begin their flowering cycle on Winter Solstice and then flowers are often visible by about February and may last until April / June depending on conditions.   The leaves and stems are perfectly edible at this stage (any stage really).  As long as the apical meristem is left intact.  See below for a photo of the meristem growth.

Garden Wasabi Plants Jan302016.jpg

Feb. 2 2015:  This photo shows the plants just a few days later on Feb. 2.  Note, I've planted a plant start from Frog Eyes Wasabi Farm in the vacant location.  Note how much the plant has grown in the next photo. IMG_3147.jpg

Feb. 20 2015.  What growth!  Observe the height of the leaves above the barrel rim that were below just 18 days ago.  Also, note the height of the two flowers and the leaf diameter.  Lastly, note the leaf coverage in multiple canopy layers with the largest leaves on top and the medium and then smaller leaves below.  These will all progress to form a full canopy with approximately 6-inch diameter leaves by April/May.  See previous posts for photos of these very same plants from past years.  This is an important point; some of these plants are the same originally planted in September 2014. Though we did lose a few in last summer's heat and our intentional neglect.  See this post for more information. 

IMG_3187.jpg

Feb. 20 2015 continued:  Wasabi flowers are rare indeed. The plants drop their leaves on winter solstice and commence their flowering cycle which ends in mid April (but can continue through June). This specimen grown in a typically shady spot in Portland Oregon in standard-issue garden soil and conditions. The flowers are edible traditionally tempura-fried or steeped into a tea.

IMG_3188.jpg

Feb. 20 2015: My finger pointing at the apical meristem growth.  That is the top of the plant.  This is the most important part of wasabi growth.  If the plant start has this, it'll continue growing.  The side stems senesce as the plant grows vertically and if really happy, producing a wasabi rhizome underneath!

IMG_3185.jpg

Posted on February 21, 2016 and filed under Plant Start, Uncategorized.

Tour Frog Eyes Wasabi Farm Virtually

Wasabi Fans, We receive frequent requests to tour the Frog Eyes Wasabi Farm.  Honestly, we'd love to accommodate everyone.  We love sharing our produce with our customers.  This creates a problem as, for various reasons, we cannot provide farm tours.  To solve this problem, the good folks at the Zagat Guide created a fantastic video of the Frog Eyes Wasabi Farm.  The video chronicles the harvest process and includes the grand finale of grating the rhizome fresh a the farm.  This is the tour we would want to provide every one of you that request(ed / s) a tour.  We hope you enjoy the tour.

[youtube https://www.youtube.com/watch?v=_EYWW1NGJMI&w=1280&h=720]

As evident on our media page, Jennifer has been the subject of many past videos.  She wanted to take a breather on this one.  Hint, somewhat like "Where's Waldo" spot the faithful farm dog Sam in nearly every segment.

We hope you enjoy this video.  We are very grateful to the creators and producers of this video.  We think they did a fantastic job and created an entertaining and informative narrative.


Posted on January 9, 2016 .

How Long Does It Last Part II: Nature's Flavor Wrapper (AKA Oxidization)

Crib notes from this entry: the black is just oxidization and actually seals in flavor and heat.  The white shoots are edible and quite tasty.  Order more wasabi than you think you'll immediately use because it should last for two months - and once you have the fresh, hot, real wasabi you'll use it more in your cooking (see this page for the many culinary uses). Before devouring this entry, I recommend reading the preceding entry, How Long Does It Last (Part I) for reference.  That referential entry anecdotally describes the wasabi rhizome's preservation abilityIn that post/entry, I described informing demo customers that the wasabi rhizome they just sampled was stored in the refrigerator for two months.  We also provided a comparison to freshly-harvested with no discernible flavor difference. This entry (Part II), shows what a two-month old rhizome looks like, preparation, presentation and an unexpected spontaneous gift from the wasabi rhizome.

The below rhizomes are over two months old and were placed in the bottom of a standard residential refrigerator vegetable drawer bin and frankly, neglected.  They were moved about, jostled and shoved aside after each week's farmers' market trip to make room for beets and summer greens.  They were wrapped in a (at one time damp) paper towel in a plastic bag; which comprises the basics of our recommended storage procedure. The white shoots all grew without the benefit of photosynthesis and is typical of post-harvest wasabi starting at about six weeks (see this recent entry about planting wasabi plant starts with white shoot growth). Bonus, unexpected, spontaneous gift: the white shoots are edible and actually quite tasty. But that's not the purpose of this post, but was included in this previous entry.  So, your long-in-the-tooth wasabi in the bottom of the refrigerator is still fine to grate up, will still pack a heat and flavor punch and has these delicious little flavor-packed shoots that your guests likely have never seen or tasted and will be a great dinner conversation topic.  So, go ahead, order a bit more wasabi rhizome than you expect to use immediately and keep it until (from now) Christmas or longer.  It'll be fine and you can grow fun, edible (and safe) things in your refrigerator!

IMG_2706

For reference, below is a package of freshly-harvested wasabi rhizomes from Frog Eyes Wasabi Farm

IMG_2665

The black is an oxidization layer that is naturally-forming and does NOT indicate spoilage.  Actual wasabi rhizome spoilage will be white or grey-colored and will be very stinky.  (Wasabi is a member of the brassica family which also includes broccoli; imagine stinky broccoli and magnify.)  Shown below is the preserved wasabi under the oxidized layer

IMG_2710

Essentially, if the wasabi does not stink; eat it.  The oxidization is millimeters thin and is shown below.  Though difficult to see, this rhizome tip is actually cutaway (reference the thin cut line about mid-point in the rhizome orientated top-to-bottom).

IMG_2711

This oxidization layer is nature's natural flavor wrapper.  It's edible - though for flavor sake I don't recommend eating it - it is not mold. The wasabi rhizome essentially seals itself from the degratory effects of oxygen. Think of it as nature's Rustoleum (trademarked / etc. I'm sure).  I typically scrape it off with the back of a knife.  A standard  peeler can also be used, though I this usually removes more rhizome flesh than I would prefer.

IMG_2707

To use these older rhizomes, remove the amount remove the oxidization from the length of rhizome that you want to grate as shown below.  Wrap these rhizomes back up in the same damp paper towel in the same plastic bag and I would imagine that they would be good for another month or so. The cut area of the grated area will re-oxidize and reseal the rhizome.  Just remember remember to not put it at the very very back of the refrigerator because it can freeze and that will make the rhizome mushy.  Freezing will affect the consistency and it will reduce the flavor as the heat.  These qualities are retained in the cell walls, which, once broken releases the heat and flavor.  The water inside the cells is released by the freeze-related expansion.  It's like the cracks in a mason jar glass that was completely with water and put it in the freezer.

IMG_2712

So everyone, enjoy your wasabi and don't be afraid to buy more than you might need because shipping is expensive and the rhizomes will last for a long time and it will grow these white shoots you can put on a dish and people will be rather amazed - and we hope, quite pleased as well.IMG_2713

Posted on November 3, 2015 .

Wasabi In The Garden: Second Autumn Planting

Wasabi Fans, Note: these white plants starts were planted in Oct. 15 2015.  The update photos below were taking on Nov. 8 2015.

It's time to plant wasabi in the garden again.  As I maintain, fall is an optimal time for wasabi planting.  We plant in both autumn and spring at both Frog Eyes Farm and our garden in Portland Oregon.  The  garden wasabi does not receive any amendment aside from an annual 14-14-14 fertilizer.  It does not receive any of the nutrients or conditions we use at Frog Eyes Wasabi Farm.  In fact, I intentionally neglect these plants and water minimally.  I want to subject them to the worst case conditions to mimic potential condition in your gardens.  This wine barrel does receive some sun for a few hours for a few weeks in the height of summer and a bit of sunlight on mid-winter mornings.  I wouldn't recommend any more sun than this, and I do strongly recommend to plant wasabi where there's no direct sunlight ever.  See below the state of the plants which, last Spring looked so healthy and lush.  The summer's sun and heat killed about half of the plants an the other remaining are struggling. (Granted, I've not watered them for about one month now and just relied on sporadic rain.)  But, the apical meristems are growing and I expect them to recover.  (Know that the plants at Frog Eyes Wasabi Farm receive very attentive care.  Indeed, it's the time I spend on the farm with those plants that precludes my care of these in the garden.  Farming's hard.  By the time I get home, I want to take a shower, have a pint, and sit down!)

P1050128

See the closeups of the apical meristem that are growing. The leaves are dried, crinkled and brittle (also tough).  That's due to the lack of watering.  They will flush out again when the rains come or I start watering.

P1050132P1050133

In fact, on this photo below, the primary rhizome/meristem has died away, but an offshoot is growing.  The wasabi plant, when stressed, will send out offshoots that will become dominant if the primary rhizome suffers.  I expect this plant to do the same.

P1050134

Now, to the planting.  I used offshoots from Frog Eyes Wasabi Farm.  These offshoots were in the refrigerator for approximately two months.  They grow these white stems much like Belgian endive.  The rhizomes and offshoots will both do this.  They are actually quite tasty.  I decided to leave them on.   I also am using these to show that the offshoots, even after being stressed and "out of the ground" for two months and nearly aerobic in the bottom vegetable drawer, will grow just fine.  If these grow, the ones we provide fresh from Frog Eyes Wasabi Farm should also grow just fine.  Remember to view the growing recommendations on our website. 

P1050125

All I did was use a trowel, dig a hole, insert the offshoot and replace the soil and water.  The white tops make the new plants more visible.  I'll provide more updates as these grow and mature.  Remember, that one of the reasons to plant in the winter is that the offshoots grow all winter and like other brassicas, the leaves and stems are all edible and will be a source of fresh greens in the dead of winter.  Add wasabi to your kale garden and brussels sprouts and you've got healthy greens in the winter!

P1050135 P1050137

UPDATE Nov. 2015

What a difference some water and shade (not sun) makes!  The new plants and the existing year-old plants are doing quite well.   See the first photo below compared to the first photo in the above Oct. entry.   New growth abounds.

Garden Wasabi Nov 2015

The below is a white-shoot plant start shown above.  The green color has returned and fresh shoots are appearing.  Note, this is the one at about the 11:00 position shown above in the October entry.   All the new plant starts are doing well.  Even after enduring being uprooted several times by squirrels.

Garden Wasabi Nov 2015-2

This photo is a one-year old plant that is an offshoot from the dried-out and dead central rhizome shown above.  See the blackened remnants of the rhizome on its side just beside this new shoot?  And see how much healthier these new shoots seem from just a few weeks ago?  Some rain and lack of sun (shade) really help reinvigorate these plants. Garden Wasabi Nov 2015-3

Posted on October 16, 2015 .